Showing posts with label Red. Show all posts

Tuesday, September 25, 2012

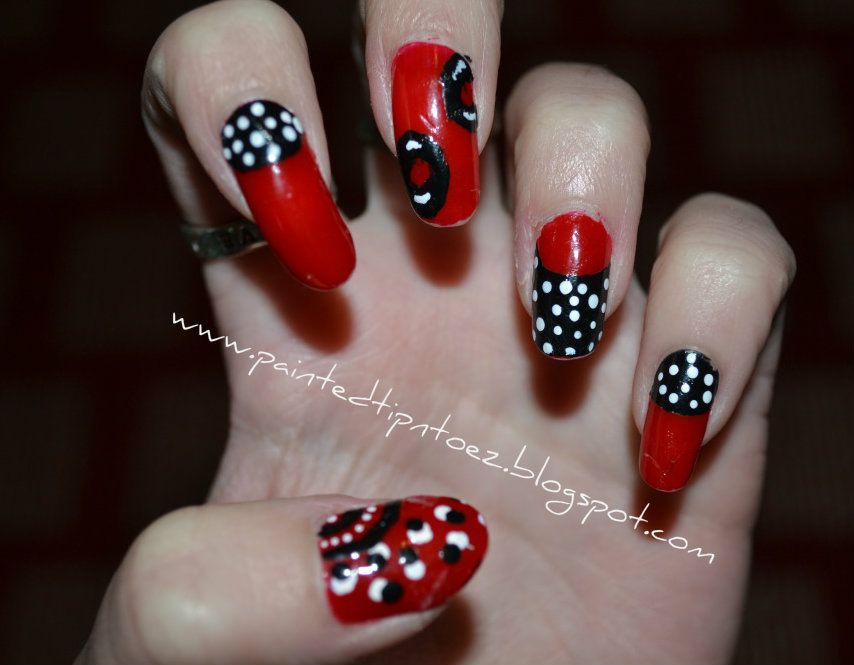
50's Sock Hop Pics + Nails :)

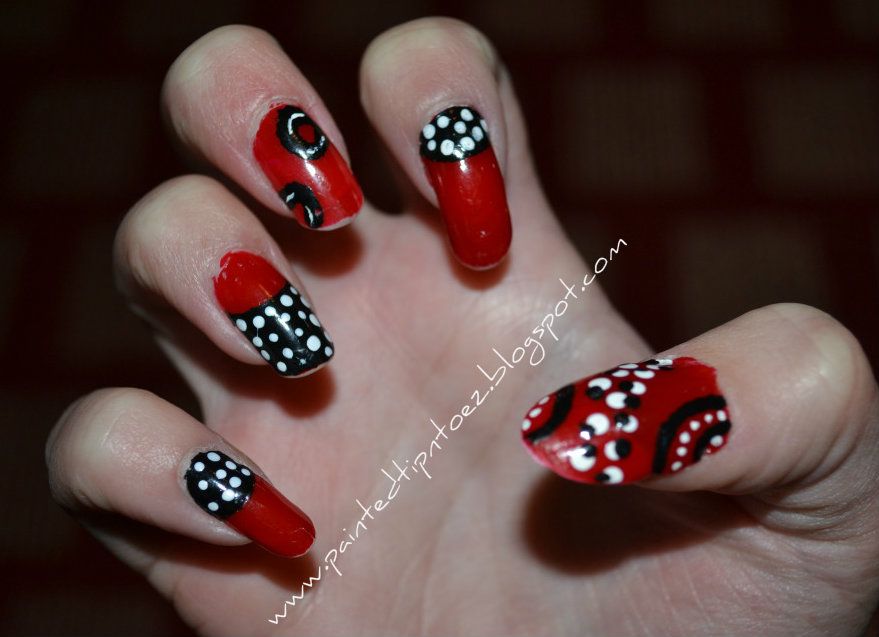
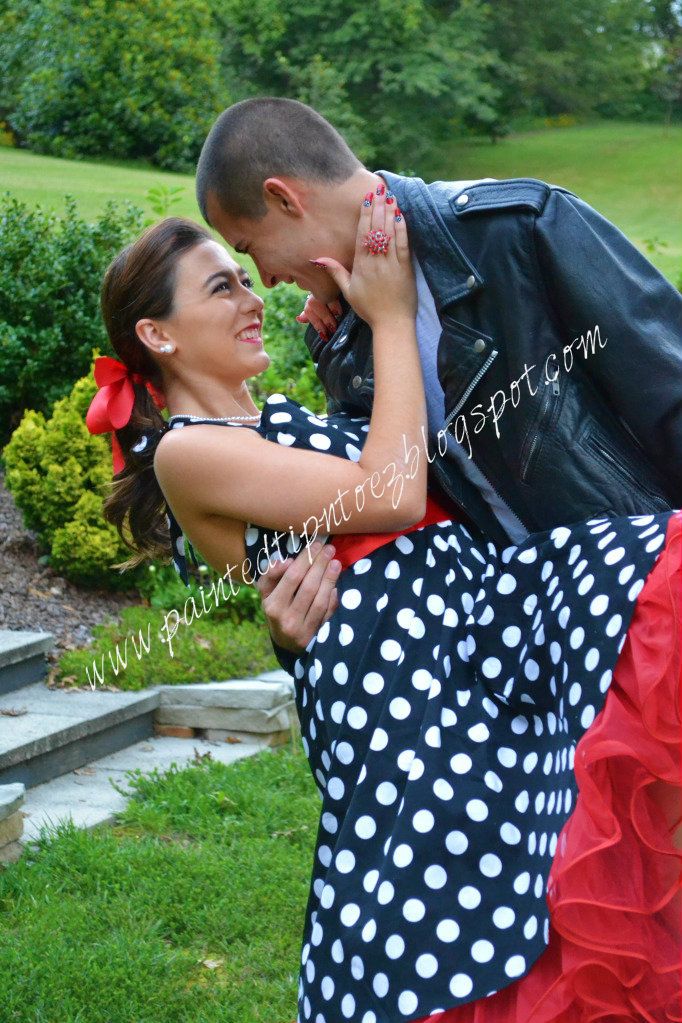
Last Weekend, My Boyfriend and I went to a 50's Sock hop!!!! We had a BLAST!!! I think we dance over half the time we were there ha-ha. Well as for what I wore and my nails everything it below! Keep reading!!

I have recently become slight obsessive with 50's hair, makeup, dresses, etc. So this was a perfect time to break out all my love for the 50's!!!!
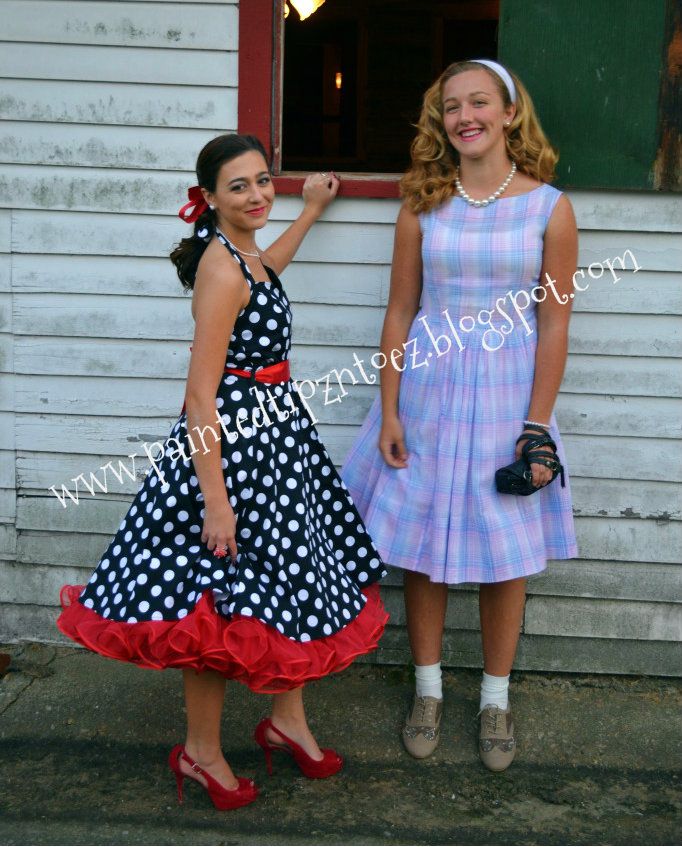
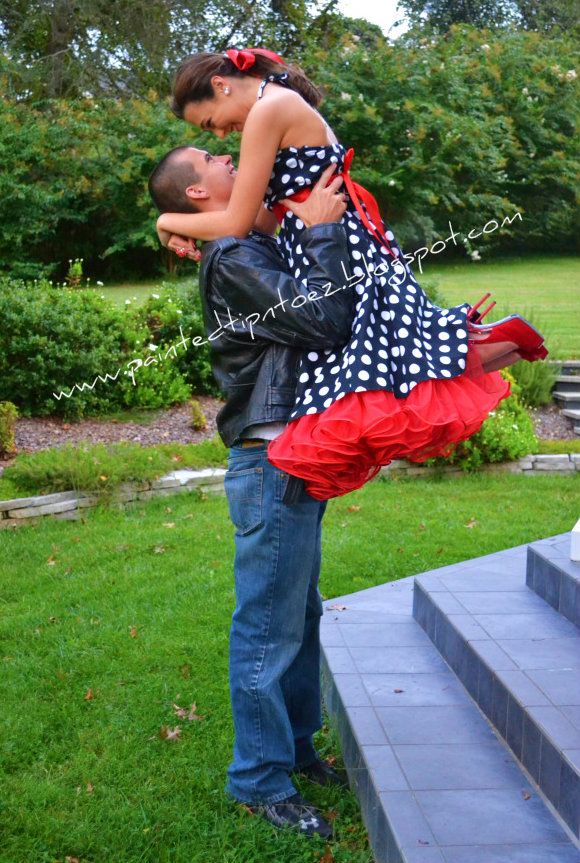
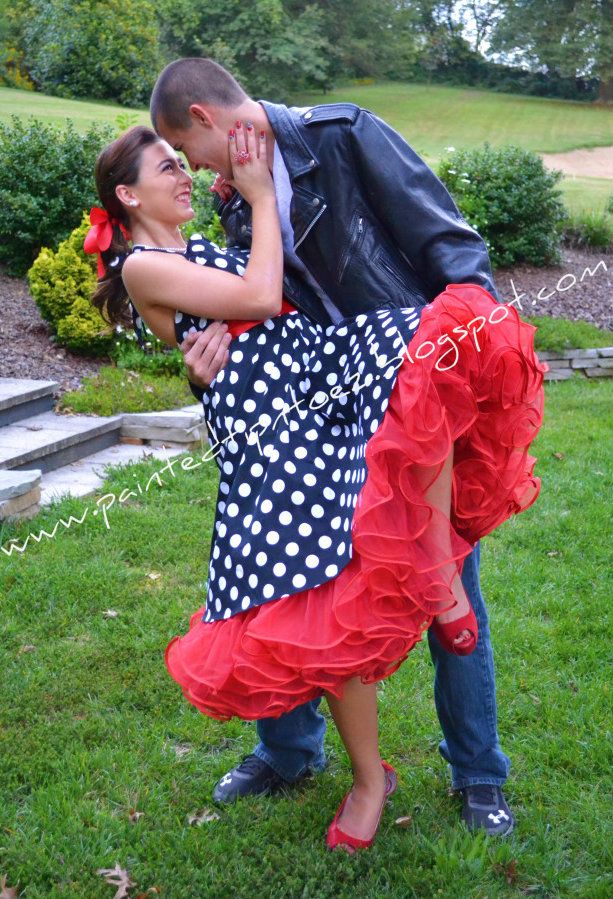
I ended up finding my dress on e-bay for only 40.00$. I purchased a medium, and I ended up having to take it to a tailor and have it taken in. When I purchased my dress, it came with the red sash but not with the red petticoat. My grandmother ended up finding my red petticoat at a little dress store in South Carolina for 20.00$. I paired my dress with some red stilettos that I purchased from JCPenny for 40.00$. These were the same shoes I wore to prom at the first of this year. For jewelry I added a small pearl necklace and earrings. I did my hair in a 50's style I found on the Internet, and then pulled it back with a red ribbon and added curls to the ponytail.

 I completed my 50's look, with so 50's makeup. I did a dark brown/black eye with winged eyeliner and red lips. I COULD NOT go without red lips. (I was in a huge rush on the night of the dance and didn't get any close up pictures of my hair and makeup sorry!!)


Colors I Used:
Base Coat- ""Ruby-Ruby" Sinful Colors
Black- "880 Black Heart" Sally Hansen
White- "134 French White Tip" NYC
Toes- "Red Glitter" L.A Fine Tip and "Gettin' Miss Piggy With It" OPI

Over all the dance went amazing! My boyfriend and I had a great time. My dress and nails look amazing! And we danced the night away!!
Below I will post so pictures that my mom took before the dance!

This is one of my favorites

My friend, Emma, and I


:)


XOXO's
Love and Nail Polish,
Sierra


Thursday, July 12, 2012

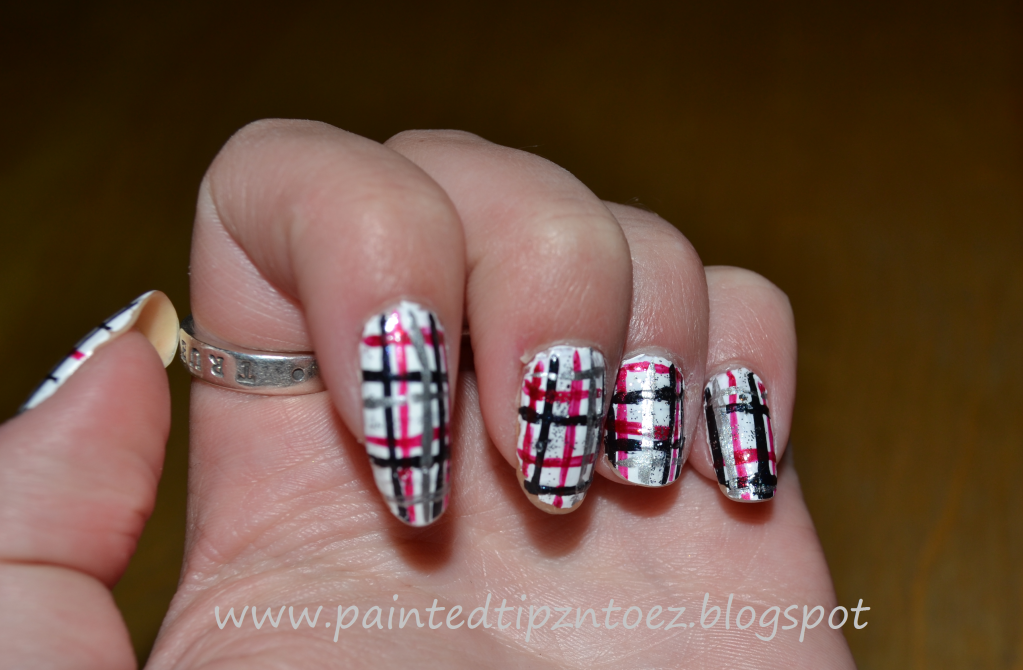
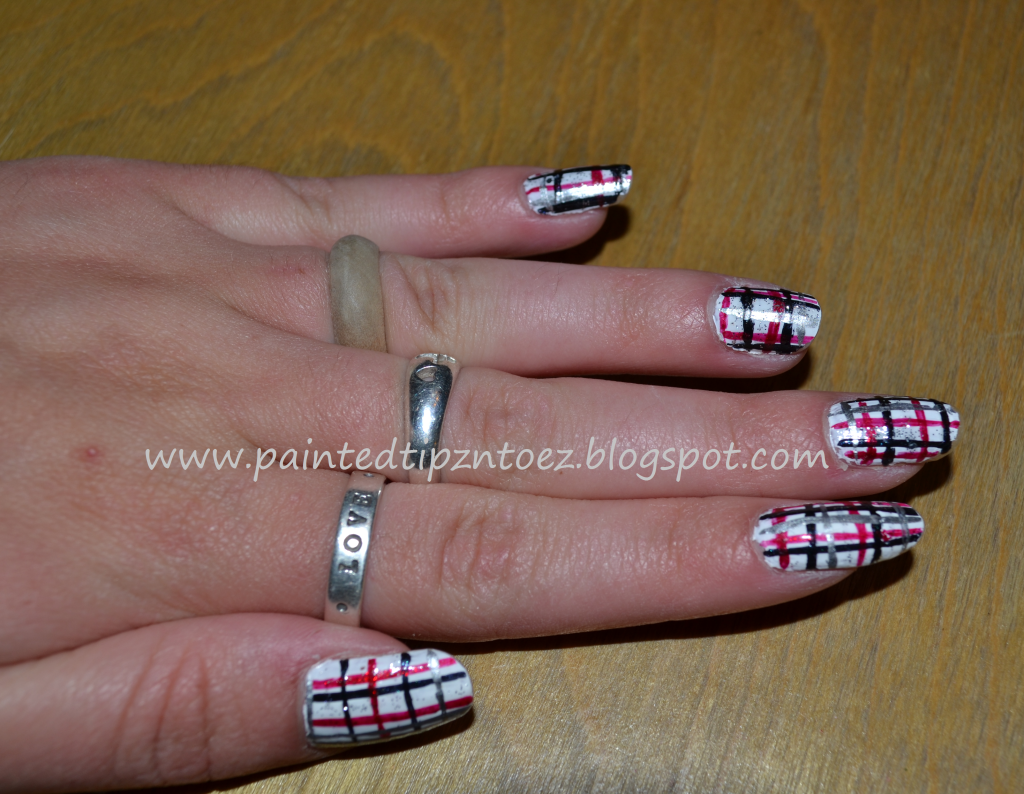
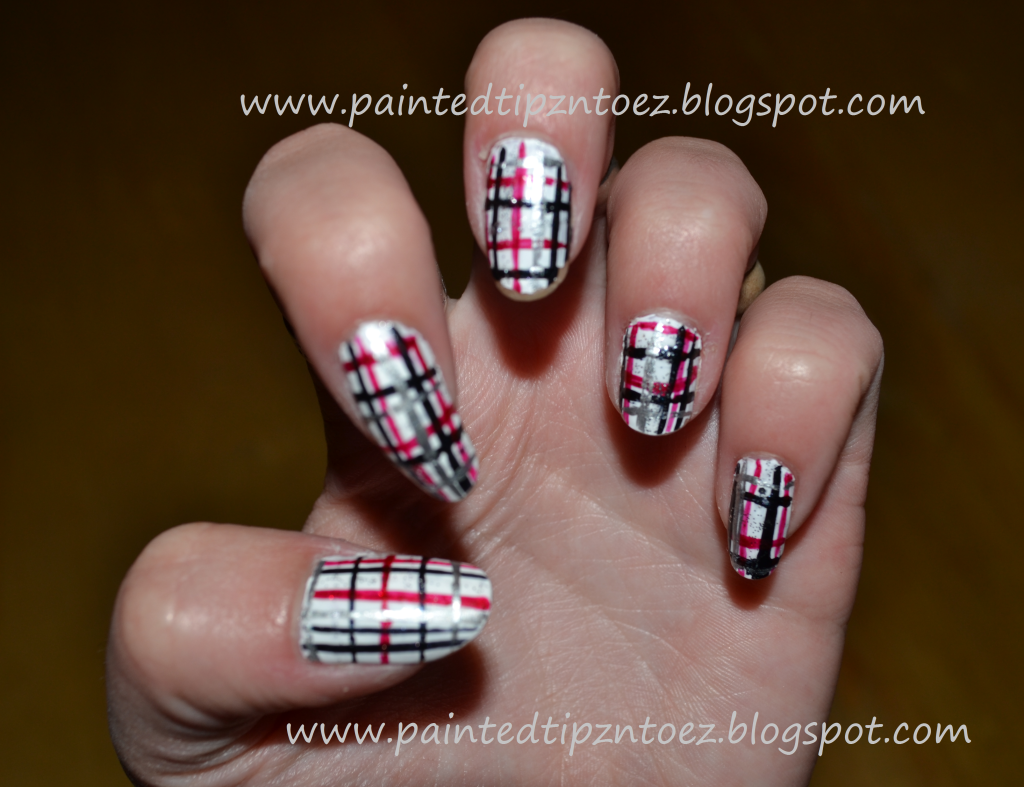
Plaid

Ok, so my oh so sweet boyfriend bought me the cutest pair of shoes last week!!!


Are they not cute?

Well the mani was inspired just by the shoes! I love the way they looked and was very please!


Colors I Used:
"134 French White Tip" and "Chelsea" from NYC,
"Silver Mercedes" from Pure Ice,
"Pearl Black" and "Rock Star" from L.A Kiss Nail Art.


XOXO's
Love and Nail Polish,
Sierra 

Tuesday, July 3, 2012

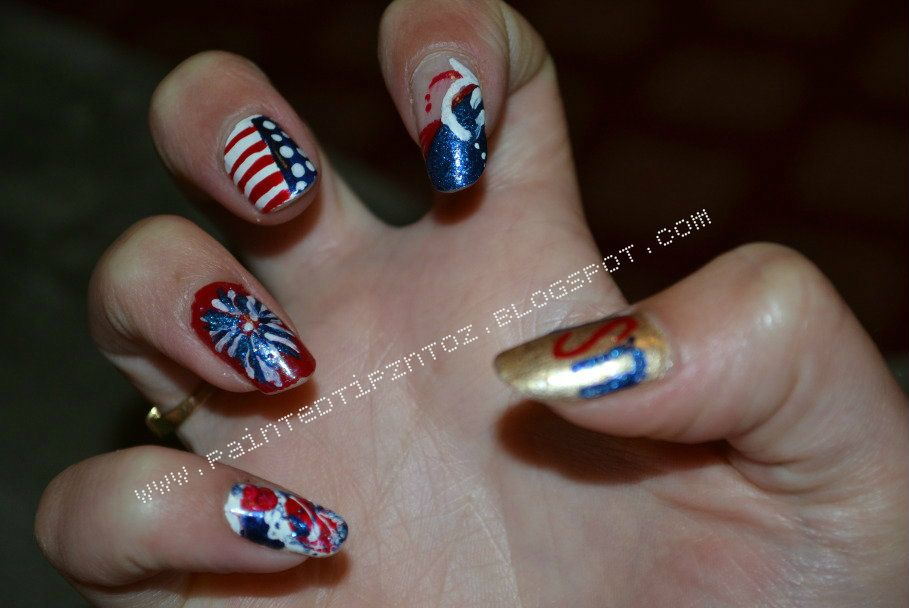
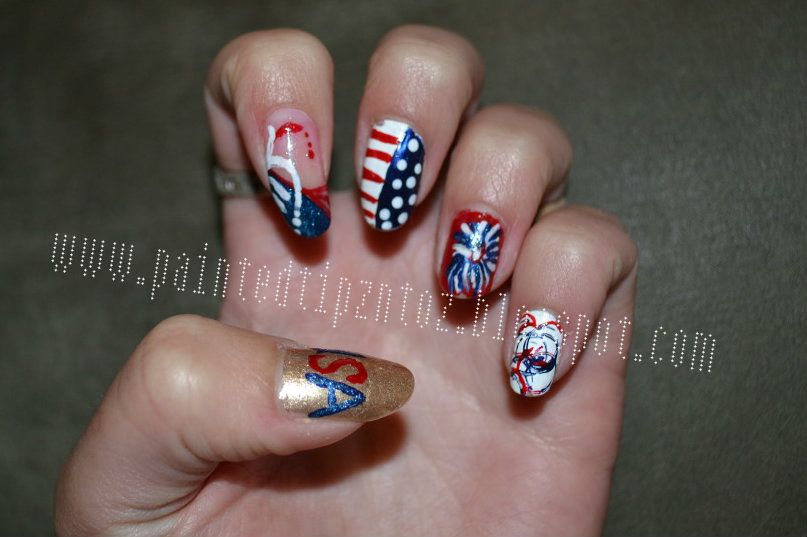
I Love USA

This year I knew I had to top last years 4th of July mani. So I spent a few days thinking about what design I wanted to do then I came up with this!


I thought it was very cute and I'm pretty sure I topped last year!! I received tons of compliments on this mani and most of the design was fairly easy.


Colors I used:
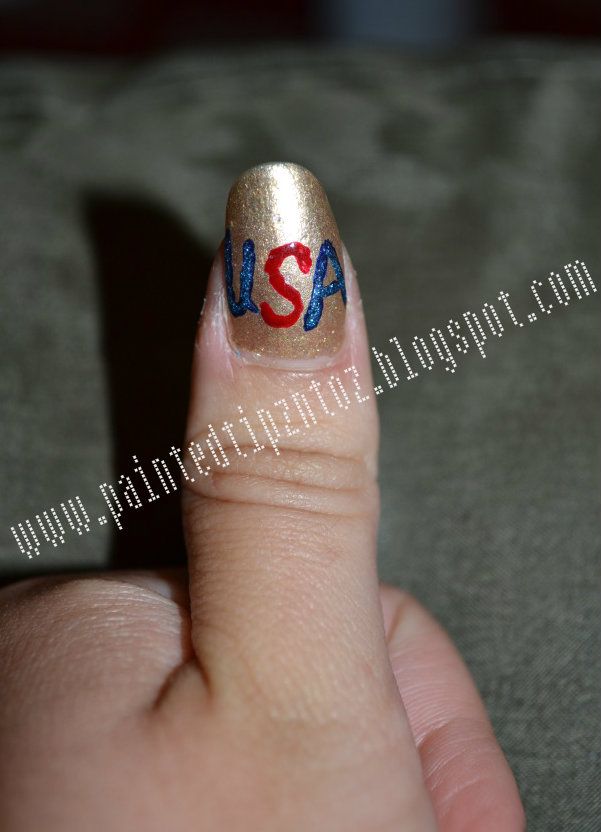
Thumb: "Big Spender" from Pro, "Fame" from Petites, "Skin Tight Denim Cream" from NYC, "Strapless" from Pure Ice, and "Primary Color" from Finger Paints.
Index: "Skin Tight Denim Cream" from NYC, "Primary Color" from Finger Paints, "Strapless" from Pure Ice, "French White Tip" from NYC
Middle: "Skin Tight Denim Cream" from NYC, "Primary Color" from Finger Paints, "French White Tip" from NYC.
Ring: "Skin Tight Denim Cream" from NYC, "Primary Color" from Finger Paints, "French White Tip" from NYC,
Pinky: "French White Tip" from NYC, "Skin Tight Denim Cream" from NYC, "Primary Color" from Finger Paints.


How I Did It:
Thumb: The Base coat was two coats of "Big Spender" from Pro, under one coat of "Fame" from Petites. The writing was done with a paint brush using "Skin Tight Denim Cream" and then I put "Strapless" from Pure Ice over it to make the blue sparkle. For the Red ''S" I used "Primary Color" from Finger Paints.
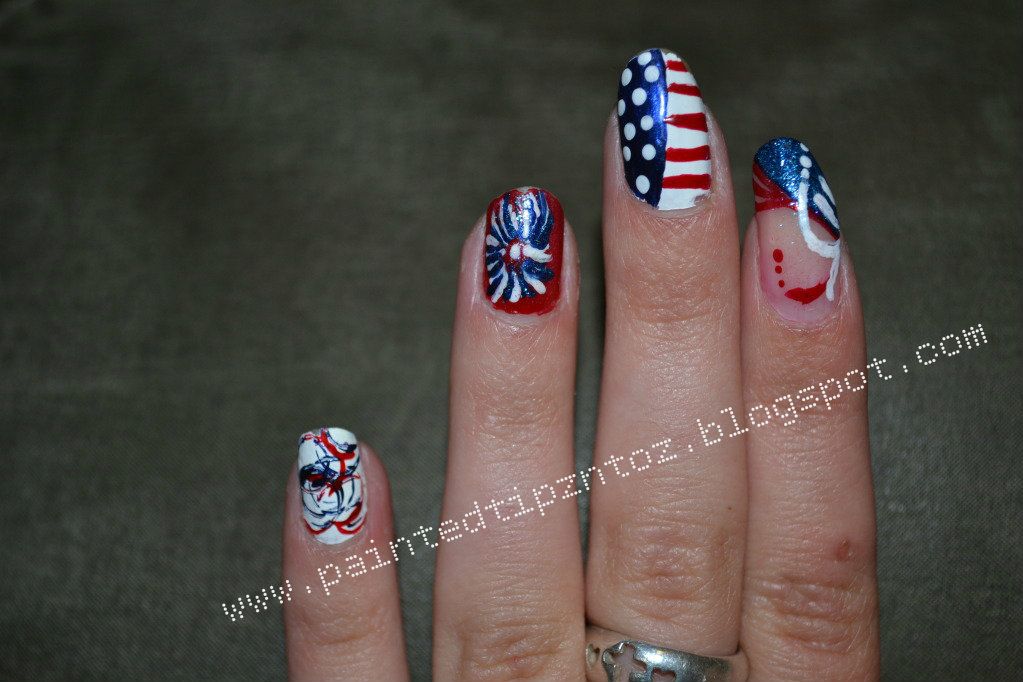
Index: For my Index finger, I used one coat or "French Lingerie" from Rimmel, this just give my nail a clear base. I did a diagonal tip using "Skin Tight Denim Cream" and "Strapless." For the details I used a fine tip brush and a dotting tool and used "Primary Color" and "French White Tip."
Middle: For my middle nail, I first painted it all white. Then I painted half of the nail using "Skin Tight Denim Cream." Again I used my paint brush and doting tool to create the stripes and dots.
Ring: My ring finger was a lot of fun! First, I painted the nail "Primary Color." Then I took my fine tip paint brush and made random, curved stripes with white polish. I came back through with blue polish and then again with white and add more blue until I had the firework the way I wanted it. This was my favorite nail of my whole manicure.
Pinky: I did both of my pinky fingers different. I couldn't decide on one design so I tried both. First I painted both nails solid white. Then, for the nail on my left hand, I dipped the end of straws in the red and blue polish and placed it on my nails. This was super easy and would make a neat full mani.
  For the nail on my Right hand, I did the splatter paint effect I did a few weeks ago. I changed nothing but the colors of polishes I used.
This manicure was definitely one of my favorites and I was very pleased with the way it turned out.


XOXO's
Love and Nail Polish,
Sierra.
Friday, March 2, 2012

Cheeteah Print Half Moon Nail Art

I have done a simple half-moon nail design before but this time I decided to take it up a notch. I went with a Red tip and a cheetah print half-moon. I love the combo and I think it looked really good together.


Colors I used:
Tip: "Crimson" from Pure Ice
Half Moon: "420 Copperglaze Platinum" "903 Hot for Chocolate" "415 Totally Toffee" from Revlon

How I Did It:
I started by painting my nails with two coats of "Copperglaze Platinum." Next I used notebook hole protectors, cut in half and placed them 1/4 of the way up my nail. This is not necessary, but it helps me get the curved line curved enough. After I made sure the sticker was adhered well, I painted two coats of "Crimson" making sure not to paint over the sticker. Once this dried I removed the sticker carefully. Make sure the nail polish has dried completely before removing it. Or the wet nail polish may smudge or come off with the sticker. Once the stickers are removed, I used "Totally Toffee" and "Hot for Chocolate" to paint a cheetah print design. To learn how to paint this design go to  http://paintedtipzntoez.blogspot.com/2011/08/cheetha-lioush.html it explains hot to paint this design. It is super easy. Over all this manicure is fairly easy and I loved the way it turned out.

XOXO's
Love and Nail Polish,
Sierra

Wednesday, February 22, 2012

Bordered Nail Design from Haute Lacquer


I have been following Haute Lacquer since I started my nail blogging journey last year. I love her graphic nail art and layering. I saw the boarding nail design a while back, but I didn't think I could do it well. However, I saw this post and loved the way it looked, so I knew I had to give it a whirl. The XOXO's definitely screamed me! Too check out the original design check out Haute Lacquers Blog - http://hautelacquer.blogspot.com/ She also has some other amazing post.

Colors I Used:
"Preal Black" Kiss Nail Art Brush, "Primary Color" Finger Paints,
"134 French White Tip" NYC

I liked it way it look, but definitely wasn't my favorite. I think my nails are a little too long to show how cool this design really looks. What to you think? Any suggest to get it to look better?
XOXO's
Love and Nail Polish,
Sierra