Showing posts with label French Tips. Show all posts

Monday, July 30, 2012

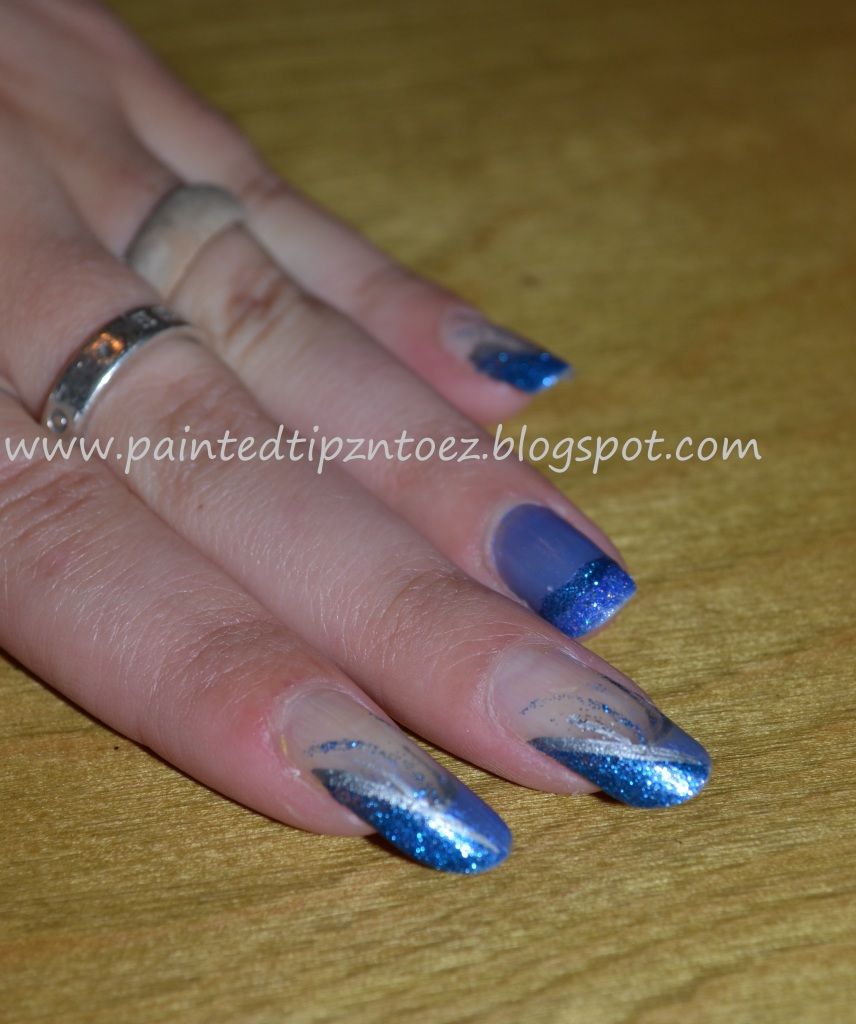
Blue French Tips


This week I wanted a mani that would incorporate "Sturdy Sapphire" my new blue polish. After, some thinking I decided to do some French tips with an accent nail. I didn't exactly know how I wanted to paint the French tips, but this is what I ended up with! I was really pleased with the way this manicure it turned out! It's definitely going on my favorites list!


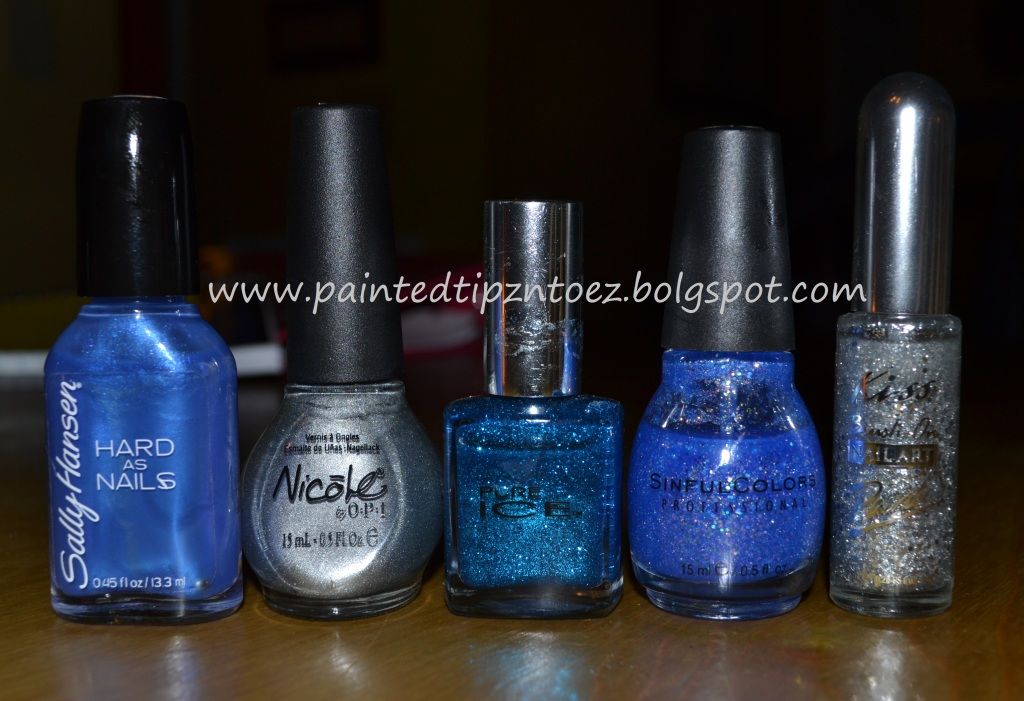
Colors I Used: "720 Sturdy Sapphire" from Sally Hansen, "Rock Star" from Kiss Nail Art, "Strapless" from Pure Ice, "Hottie" from Sinful Colors and "Positive Energy" from Nicole by OPI


XOXO's,
Love and Nail Polish,
Sierra

Monday, November 14, 2011

Cherry Blossom Nails


Just a quick post about my weekend mani before I head off to bed. This week, I decided to do cherry blossoms on my nails. I have wanted to do this design for a few weeks now, but I had not had the time to paint them.
For this manicure I used  "White" from I Love My Nails to paint the base of the manicure and "Splash" from Pure Ice to paint the blue french tip.
Once the base was dry I painted the cherry blossoms and the limbs. To paint the design I used my dotting tool, a fine tip paint brush and a wide brush. I did not have the shade of brown polish I needed, so I ended up mixing some dark brown, a little of black acrylic paint and "Warm and Fozzy" nail polish from OPI.
Then, I carefully paint the limbs in random directions using a fine tip paint brush.
For the flowers I used "Flirt Alert" from Pure Ice and some white acrylic paint.  To paint the flower buds, I used my dotting tool and  for the flowers on my thumb and ring finger I used a wide pain brush.
When I started this design I wasn't sure how to paint the flowers. So I watched some video tutorials off of YouTube. This made the whole manicure a lot easier. I definitely could use some more practice on painting the flowers, but I love the way it turned out. Well that is my manicure for this week and I am heading to bed. Have a good night, my dear readers.
XOXO's
Love and Nail Polish,
Sierra

Monday, October 10, 2011

Dotted French Tips

For this manicure I wanted to do a cute but eye catching design. I already had the base coat painted, which was "Peppermint Chrome" from Boggi. I really liked this polish, it was a nice shiny chrome and last for about 5 days without chipping. For the tips I decided to use "Positive Energy" from Nicole by OPI and "Liquid Leather" from China Glaze. To do the design I used my dotting tool and rotated black and silver dots over my tips. This main took about two hours. But most of the time was waiting in between layering more dots. But overall it was very easy and I really liked the way it turned out.
XOXO's
Love and Nail Polish,
Sierra

Monday, September 19, 2011

Crackle Tips

When I did this manicure, I wasn't sure how it would turn out. But I ended up loving the way it looked.


For the blue base coat in this mani I used "Hottie" from Sinful Colors. Since the color was a sheer it took about three coats to show up good. After, the blue dried I apply my new white crackle "Flash" from Pure Ice. I was concerned the white wouldn't crackle as well since I was layering it over a glitter polish. The polish crackled a little slower than normal, but it did turn out correctly. To add a bit more sparkle I decide to add a sideways gold stripe. For the gold I used "Flower Girl" from Sinful Colors Fine Tips.  I love the way the color combination turned out in this mani. One of my friends said the colors reminded her of the Disney movie "Cinderella" so now I can’t help but call these my Cinderella nails. Over all this mani was sure cute and very easy.

XOXO's
Love and Nail Polish,
Sierra
Thursday, September 8, 2011

A Different Kind of French Tips

After, failing at a design a friend wanted me to try I decide to go with a different kind of french tip for my mani.


This week I decide to just go with a funky French tip design.


For the base coat on my nails on used "Dream On" from Sinful Colors and for the tips I used "Risk Taker" from Pure Ice. I thought the plain tips didn't look cool enough so I decide to add abstract stripes and dots to the tips. I did the light silver stripes in my fine tip "Silver" from L.A Colors. The Black and White Dots are done using my dotting tool in "Liquid Leather" from China Glaze and "White" from L.A Colors. After, doing that design I decide it still wasn't enough so I did a sponge effect on the tips. I used "Kiss Me Here" from Pure Ice and then I sponged on a small amount of "Liquid Leather." I sponged the gray about half way down the tip and I placed the black about a 1/4 of the way down the tip. This design wasn't amazing. But I did think it was cool and my boyfriend loved them. For some reason the past few mani's I have done, have not amazed me. I'm not sure why, I think is because I haven't had time to do a time consuming design lately. Oh! the joys of school... However, I did learn something new about the sinful colors polish. I didn't clear coat my nails because I did not want to design to last long. I thought the purple color would look a little matte. The first time I painted them, the color was matte until I used a clear coat. This time after a few hours of wearing the color it became shiny. I'm not sure if the color needs to set or what but it did shine after some time. I also found out the Sinful Colors flakes EXTREMELY easy. I wore this mani for about three days and it looked like I had worn it for a week or longer. This is definitely a color that needs a top coat.

Over all this mani
XOXO, Love and Nail Polish,
Sierra

Friday, July 22, 2011

Summer Time French Tips


After, wearing my snake skin manicure, I decided I wanted something bright. I went back n forth between tips or solids for a little while and then I finally decided on these summer looking French tips. For the base coat I used French Peach from I <3 my nails, I always use a cream/clear coat before I add the polish for the tips. For the tips I used "Blue Collar" from Orly, “Wild Thing" and "Crème Flirt Alert" both from Pure Ice. After, my nails dried I thought they looked to plain so I decided I would do a dot design. I use the three colors listed above and add an orange color. This color is "Bright Orange” from LA nails. LA colors are not very creative with their names, but I love the fine tip brushes. To do the dots I dropped some finger nail polish onto an index card and then dipped my dotting tool in the dot of polish that was on the card. It was fairly easy, except the polish I had dropped on to the index card dried extremely fast. But I think that had to do with me painting my nails outside in the heat


I tried to get a picture of the sparkles. This was the best pic I was able to take.
Once my nails had completely dried I used a sparkly top coat from Finger Paints called "Holiday Sparkles". I don't quite understand the name because in curtain sunlight it was blue and purple.  However, I thought it added a good slightly sparkly finish.


XOXO's Love and Nail Polish,
~Sierra