Showing posts with label Pure Ice. Show all posts

Sunday, July 15, 2012

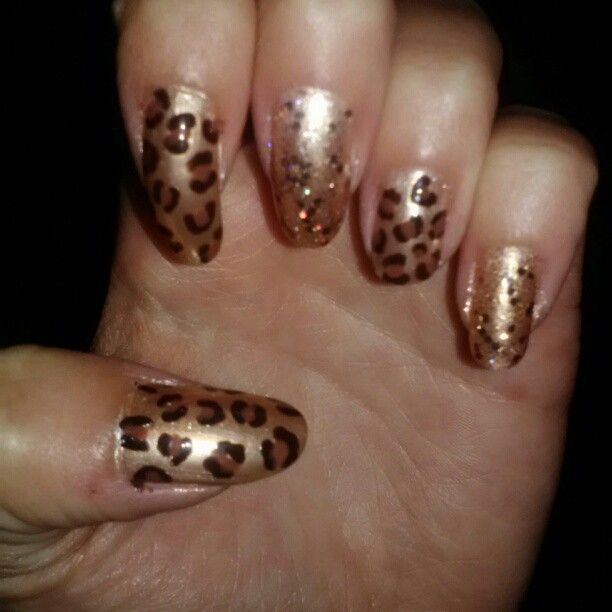
Cheetah!!!

I left for a 3 day get away, shortly after I did this manicure.
So I ended up taking the picture with my phone. Sorry for the poor quality.

I loved the way this manicure turned out! If you have read my blog before you will know how I do my cheetah print. Then, all I added was some sparkles!!!!!

Base Coat: 2 coats of "Gold Dust" and "Best Friend" from Pure Ice
Cheetah Print: "903 Hot for Chocolate" and "415 Totally Toffee" from Revlon
Sparkle Nails: "Spit Fire" Pure Ice, "Set the Stage" from Sally Hansen, and
"Traffic-Stopper Copper" from Sephora by OPI

XOXO's
Love and Nail Polsih,
Sierra

Wednesday, June 13, 2012

Pure Ice

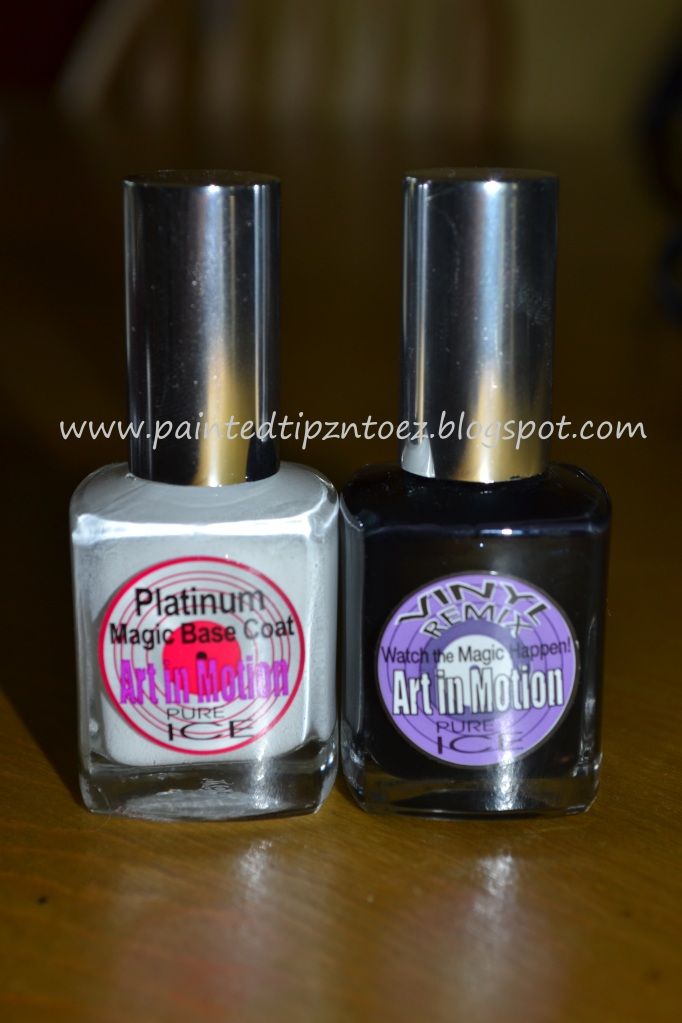
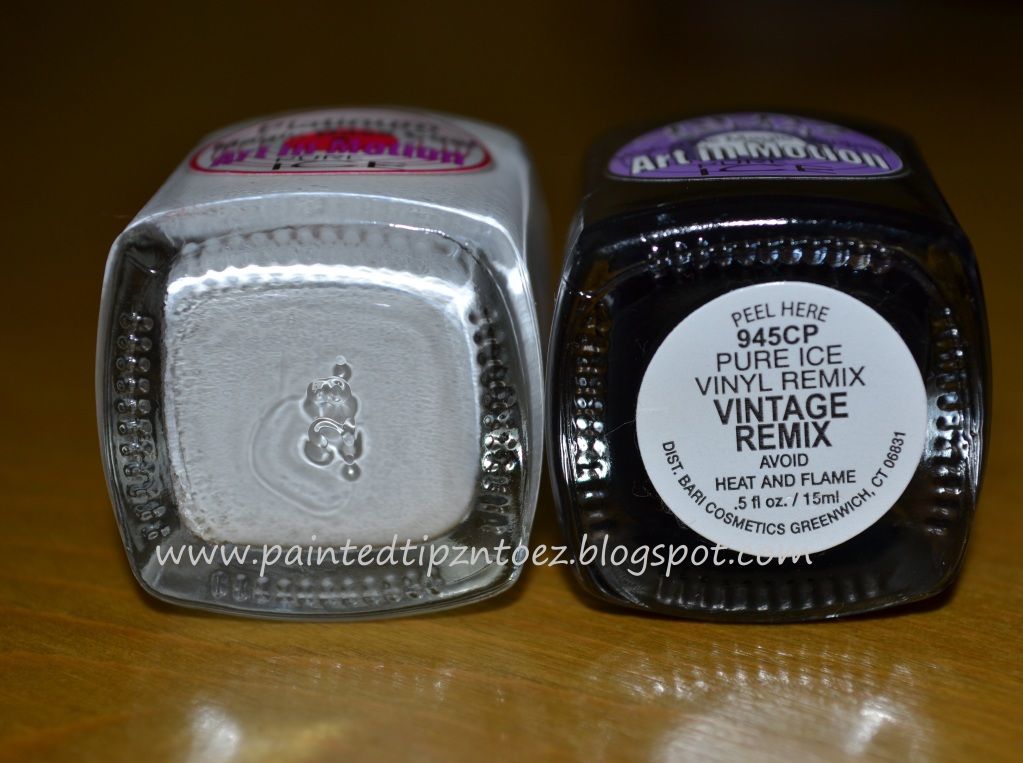
 I saw this at Wal-mart the other day I had to pick it up. Just so I could give it a whirl. This is "Art in Motion" a new collection from Pure Ice.


First you paint your nails a thick coat of "Platinum," which would be the white polish. Once that has completely dried, you get to decide which way you would like to paint on the black polish. You can paint the polish, side-ways, straight, diagonal, or a mixture of both. When you paint on the black polish, it will begin to crackle and the white base coat will began to change colors. The color the polish changes depends on the kind of "Art in Motion" polish you buy. The polish I bought was a purple color so I ended up with light, very pretty purple color! I really like the new Pure Ice collection. However, I could have achieved the same look with a regular Pure Ice polish and Crackle. Over all I liked the way my manicure turned out and the effect was very cool.

Xoxo's
Love and Nail Poliah,
Sierra

Friday, April 20, 2012

Pirate Nails

Last week I decided to have a pirate themed movie party! I knew I need something fun and festive for my nails, so I decided to add some pirate flair to my nails.


Colors I Used:
Map Nails-  "Best Friend" Pure Ice, "Pearl Black" Kiss Nail Art, and "Primary Color" Finger Paints
Skull and Cross Bones- "Electric!" Pure Ice, and "134 French Tip White" NYC
Pirate Face Nails- "Best Friend" Pure Ice, "134 French Tip White" NYC, "Primary Color" Finger Paints and "Pearl Black" Kiss Nail Art,

How I Did It:
I think the Map nails, explain them self. I used my fine tip paint brush for all of the details and I thought these turned out great!
The Skull and Cross Bones were a little more difficult. I used my dotting tool and kept working at the shape of the skull till I thought it looked right. For the Cross Bones I painted an "X" then with my dotting tool added two dots and each end of the "X." This design was really simple you just have to work at it will you get the shape correct.
For the Pirate Face nails, I started by painting it the base coat. Then I add a thick, red stripe to 1/3 of my nail. This will become the bandanna of the pirate. Once, the red had dried I add some white dots with my dotting tool. I add to black eyes and a reddish/pink smile. For the nose of my pirate I used the same polish as my base coat but mixed it with some white polish. The Pirate face was a little hard but looked super cute when I done. Over all this was on the moderate scale for nail design. I had a lot of fun with it and really liked the way it turned out.
XOXO's
Love and Nail Polish,
Sierra

Saturday, December 10, 2011

SnowMan!!


This week, I needed a quick mani and I wanted to start my Christmas designs. So after some thinking I decided to paint a snow man.
To start this mani I painted all my nails except my index finger "Scandal" from Pure Ice. On my index finger I used "French White" from NYC. After letting the base coat dry I added a sparkle polish from Pure Ice. This just helps the polish resemble snow.

To paint the snow man's features I used "Black Lace Cream" from NYC "Orange" from LA Colors. To make the eyes and smile, I dipped my dotting tool into black paint I placed on to an index card. For the nose I painted small orange stripe to resemble a carrot stick.
This was a super quick mani and I love the festive look it gave :)

XOXO's
Love and Nail Polish,
Sierra

Friday, September 30, 2011

LION KING 3D

When I found out Lion King 3D was coming out, I knew I had to see it. I made plans with a friend and we both decided to go see it on Saturday. On Friday I was looking at my nails and decided that I wanted to do something Lion King inspired. After much thinking I decided to do safari animal print. I picked out five different animals and decided to do each print on a different finger. Over all I loved the way it turned out.


What ya think?
For the giraffe print, I layered two coats of "Un-Zip Me" from Pure Ice over one coat of "Copperglaze Platinum" from Revlon . To paint the giraffe spots I used a small paint brush and "Totally Toffee" from Revlon.
To Paint the cheetah print, I used "Copperglaze Platinum" "Totally Toffee" and "Hot Chocolate" from Revlon. To see the way I painted the cheetah technique check out my cheetah print post.
This is the second or third time I have done tiger print. It seems like I get better every time I do this design. For the base, I used one coat of "Big Night Out" from Rimmel under one coat of "Hot Tamale" from I Love My Nails. For the stripes, I used "Liquid Leather" and use a paint brush to carefully draw on the lines. 
A close up on my Lion print nail.
For the Lion design, I used two coats of "Gold Dust" from Pure Ice layered under one coat of "Un-zip Me" from Pure Ice. I took me a little while to decide how to get the point of a Lion across, since it doesn't really have a certain print. I first started but sponging a little of "Hot Tamale" and "Copperglaze Platinum" half way down my nails. Then, I mixed "Copperglaze Platinum" "Totally Toffee" from Revlon and "Magic" from Pure Ice on an index card. I took a hard bristle brush, dipped it in the paint and quickly dragged it across my nail. This created the look of hair across my nail. It turned out really good on my left hand, but not as well on my right.

For the zebra print, I used "Super Star" from Pure Ice and "Liquid Leather" from Finger Paints. I did this design the same way as the tiger design, except I drew the lines a little different.
For my green nail, I used "Camouflage" from Rimmel as the base coat. Then, I used "Liquid Leather" for the writing.
Over all this mani took about 3 hours and I love it!! Plus the movie was amazing!!! :)

XOXO's
Love and Nail Polish,
Sierra

Friday, September 23, 2011

Pink Sponge Mani


This week I was looking for a cute but quick mani. I thought about a few designs and I finally decided on another sponge technique. I was in a pink mood so I picked three pink polishes. I used "Love" "Flirt Alert" and "Free Fall" all from Pure Ice. I started this mani by painting a thin coat of "Free Fall" on all of my nails. Then, I sponged "Love" at the tips. When I had fully covered the tips, I sponged "Flirt Alert" in the middle and "Free Fall" at the end. I loved the way each color blended together. The sponge effect is definitely one of my favorite techniques. For my Index finger I decided I wanted something a little different than the rest on my nails. So I decided to do a glitter and jelly sandwich.  I started with two coats of "Free Fall" and then applied one coat of "Party of Five Glitters" I love this polish!!! Once that was dry I used another thin coat of "Free Fall" to finish my sandwich. This was the first time I had ever done a glitter and jelly sandwich. So far I really like the design and I cant wait to do more manicures this way.  Over all this mani was really quick and super cute. XOXO's
Love and Nail Polish,
Sierra

Monday, September 19, 2011

Crackle Tips

When I did this manicure, I wasn't sure how it would turn out. But I ended up loving the way it looked.


For the blue base coat in this mani I used "Hottie" from Sinful Colors. Since the color was a sheer it took about three coats to show up good. After, the blue dried I apply my new white crackle "Flash" from Pure Ice. I was concerned the white wouldn't crackle as well since I was layering it over a glitter polish. The polish crackled a little slower than normal, but it did turn out correctly. To add a bit more sparkle I decide to add a sideways gold stripe. For the gold I used "Flower Girl" from Sinful Colors Fine Tips.  I love the way the color combination turned out in this mani. One of my friends said the colors reminded her of the Disney movie "Cinderella" so now I can’t help but call these my Cinderella nails. Over all this mani was sure cute and very easy.

XOXO's
Love and Nail Polish,
Sierra

Friday, September 16, 2011

More Nail Polish :)

ANOTHER NAIL POLISH HAUL!!! Oh how I love going nail polish shopping. Getting new bottles always makes me smile. After, getting my permit (which I was extremely thrilled to have), I went by Walgreens and picked up these four colors.
Aren't they pretty!! haha
Left to right: "Night Prowl" from Wet N Wild. This polish is a dark black, with lots of fine purple glitter. In the shade the polish looks like a regular black. But when the sun hits it just right you can tell it is filled with lots of purple glitter. I think it was about 99 cents, so it was a very reasonable price. I put this color on my toes and I really like it.
Next, is "Party of Five Glitters" also from Wet N Wild. I LOVE this polish. It is filled with small glitters, medium glitters and even hexagon glitters. I can't remember the price on this one, but I think it was around a dollar.
The third polish, in the picture is "Hottie" from Sinful Colors. This color reminds me of "Last Friday Night" from the Katy Perry collection from OPI. I saw "Last Friday Night" a while back and I looked up some pics of it to see if it was similar. "Hottie" seems to be a little lighter but a very close dupe. This polish was around 1.99$ and I really like it. However, it is a pain to remove because of all the glitter.
Fourth, is "Flower Girl" from Sinful Colors. This polish is one of their fine tip polishes. I loved that the color is a nice gold, instead of being to orange or yellow gold color. The polish also applies very easy and was only around a dollar.
The last polish is "Flash" from Pure Ice. But this is not just a normal white, it is a crackle polish. I have been wanting a white crackle, but I had not had the chance to find one yet. So when I saw this little bottle on the display I knew I had to grab it. This polish was 3.99$ but totally worth it. I am still curious how the OPI, Finger Paints and Sally Hanson's crackle polish work. What are you opinions on what is the best one?
I also found out that Pure Ice and Sinful Colors have a Halloween collection out. I was kinda disappointed in the Pure Ice collection thought. Because there were no new colors besides a new Glow N the Dark and a Black Light polish. The Sinful Colors Collection was really nice. It had a lot of fall colors that will look good.
Over all I am very satisfied with my new polishes and I sure you will be seeing them again soon.
XOXO's
Love and Nail Polish,
Sierra
Tuesday, September 13, 2011

Glow N' The Dark Mani

My nails now GLOW in the DARK!! I couldn't wait any longer, I had to see the way it would turn out.

For this mani, I used "Rescue Me" from Pure Ice which I talked about in a previous post. It took about 4 coats to get this polish to really show up because of how sheer it is. For my index finger I decided to see how the polish would do over another color. So I painted both of my middle fingers "Wild Thing" from Pure Ice. When I layered "Rescue Me" over the polish it applied easy and only took about two coats instead of four coats. Layering the polish didn't change how much it glowed but it did tint the polish slightly.
After, wearing the regular Glow for a day or two I decide to add a black crackle. The crackle I used is "Strobe Light" from Pure Ice. I decide to do both sideways and regular crackle for a little bit of a different look.
 After, painting the crackle I realized my nails were not going to glow as much because of the black polish. So I added another coat of "Rescue Me" over the crackle. It made the black a lighter shade. But it did not change it much at all and it glowed just the way I was hoping it would. I loved turning off all the lights and watching my nails glow with a greenish light.  Over all this manicure was easy and very cute.


Thursday, September 8, 2011

A Different Kind of French Tips

After, failing at a design a friend wanted me to try I decide to go with a different kind of french tip for my mani.


This week I decide to just go with a funky French tip design.


For the base coat on my nails on used "Dream On" from Sinful Colors and for the tips I used "Risk Taker" from Pure Ice. I thought the plain tips didn't look cool enough so I decide to add abstract stripes and dots to the tips. I did the light silver stripes in my fine tip "Silver" from L.A Colors. The Black and White Dots are done using my dotting tool in "Liquid Leather" from China Glaze and "White" from L.A Colors. After, doing that design I decide it still wasn't enough so I did a sponge effect on the tips. I used "Kiss Me Here" from Pure Ice and then I sponged on a small amount of "Liquid Leather." I sponged the gray about half way down the tip and I placed the black about a 1/4 of the way down the tip. This design wasn't amazing. But I did think it was cool and my boyfriend loved them. For some reason the past few mani's I have done, have not amazed me. I'm not sure why, I think is because I haven't had time to do a time consuming design lately. Oh! the joys of school... However, I did learn something new about the sinful colors polish. I didn't clear coat my nails because I did not want to design to last long. I thought the purple color would look a little matte. The first time I painted them, the color was matte until I used a clear coat. This time after a few hours of wearing the color it became shiny. I'm not sure if the color needs to set or what but it did shine after some time. I also found out the Sinful Colors flakes EXTREMELY easy. I wore this mani for about three days and it looked like I had worn it for a week or longer. This is definitely a color that needs a top coat.

Over all this mani
XOXO, Love and Nail Polish,
Sierra

Tuesday, September 6, 2011

Pure Ice Polish Haul


Look at all those colors lol. These are some rather new polish I have bought. Some of them I haven't even had a chance to use. All of them came from Walmart, they have a wide selection of Pure Ice colors. So usually I get most of my Pure Ice polishes from there, plus it is really cheap like 1.99 per bottle.  Here is some close ups of the pics and also their names

Right to Left: "Unzip Me",  "Busted", "Dreamy" "Free Fall", "Risk Taker", "Heart Breaker"
and "Rescue Me"
So far I have really liked using all of the Pure Ice colors. Which polish from Pure Ice have you tried?
XOXO's
Love and Nail Polish
Sierra

Saturday, September 3, 2011

Pure Ice-Rescue Me (Glow In The Dark)


I recently Googled a list of Pure Ice nail polishes. One of the first colors that popped up was "Rescue Me". I had seen this color at Walmart and sorta liked it but I had not bought it yet. That was until I found the list and right under its name it read GLOW IN THE DARK! I think I literally squealed in joy. It has been years since I owned glow in the dark polish. I was thinking about going out and getting the Glow polish from the China Glaze, Haunting Collection. Most likely I still will because I want to see if the polish is any different from the Pure Ice. Today when I bought this polish, I came home, held it up to the bathroom light, and cut ALL the lights off just to see if it really did glow. When I saw the green-ish light come from the bottle I was even happier.

 
I can't wait to see how this polish turns out on my nails.
Hopefully I will get to use it soon
XOXO's
Love and Nail Polish,
Sierra

Saturday, August 27, 2011

CHEETHA-Lioush

I think today's title pretty much sums up the picture of my nails.


So what ya think?
This is the second time I have tried Cheetah print. The first time I did it on my big toe. I meant to get a pic of them before I took it off because I also used my Sally Hanson Duo-chrome polish. But sadly I totally forgot. Anyways, it took about 2 hours to accomplish this mani and was EXTREMELY easy. When I first decided to do this design I thought I was going to be a lot harder. But I was surprise how quick and easy it was.
For this manicure I used "Hot Chocolate," "Copperglaze Platinum" and "Totally Toffee" from Revlon. For the purple accent nail I used "Scandal" from Pure Ice and a fraken I made. This was the first franken I have ever done and I was super excited to paint it on my nails. I loved the color; however, I think it needs more glitter and sparkles. I might work on that some more later. I still haven't picked out a name for my new franken. Any Ideas?


To paint the design I started with a base coat of "Copperglaze Platinum" It is a sheer goldish color so it took about two coats. I do not like this color plain, but I think it's a great base for designs.

 On my ring finger I painted a coat of my new nameless franken. This also took about two coats. After, the base coats dried I dipped out some "Hot chocolate" polish on to an index card. Then I dipped the tip of my dotting tool into the paint. To apply it on my nails I did small "c" and backwards "c." This made the dark outline for the print. I did the same on my light purple nail except I used "Scandal" since it is a deep purple shade. When this had dried I again place some more polish onto the index card. This time I used "Totally Toffee" I used my dotting tool and painted in between the dark "c" I had already painted. I thought this color made a good contrast with the other colors on my nails. On my Ring Finger I did not paint inside the lines. I debated on using another purple or a silver but I thought I would be to distracting. When I finished the mani I painted a light top coat and TA-DA my
Cheetah-lioush nail were ready to roar.
XOXO's
Love and Nail Polish,
Sierra
Wednesday, August 10, 2011

Watermelon Nails


What's one of the biggest summer time foods everyone enjoys? If you guessed watermelon then you guessed right! Haha. I figure since watermelon was a trade mark for summer I had to do it on my nails. I wasn't quite sure how to begin doing this nail design so I looked up some pictures and got a pretty good idea how to do the design.

I started by painted my nails a solid reddish/pink color. This is going to be the base of the watermelon. I used "Vineyard" form Pure Ice for my base color. I first thought about using one of my red colors but in my opinion using the red for a base coat makes the design look more like strawberries instead of watermelons. After I painted my base coat I let it dry a few hours before doing details. I knew I would be using note book page reinforcer to get a good curve in my tips and I definitely did not want the sticker to stick to my nails. I placed the stickers at the tip of my nail and painted it a deep green color, I used Camouflage from Rimmel. While I waited on the color to dry, I placed a few drops of "Wild Thing" from Pure Ice onto an index card. When my nail tip became tacky I painted another coat of "Camouflage" and then used a dotting tool, I applied the "Wild Thing" green to my nail. I had some trouble getting the greens to blend together the way I wanted them to with my dotting tool. So I decided to try a tooth-pick. That also didn't work so I tried using a paint brush. This work very well and was super easy. After, the green polish dried, I peeled off the stickers. This time I had no trouble peeling them off. When all the stickers were off I took my fine tipped white which is "White" from LA Colors and drew a small white line under the green to resemble the rind of a watermelon. The last step for this mani is seeds. I used "Liquid Leather" from China Glaze. I found out that using my dotting tool and slightly pulling the small black dot down works better than a tooth-pick. But both will do fine. I put three small dots on each finger but you can do more depending on what you like. Over all this mani was fairly easy and I really loved wearing it around.
Until next time,
XOXO's
Love and Nail Polish,
Sierra.

Wednesday, August 3, 2011

Sun-Set Sponged Nails


I did this about 3-4 days after I painted the design.
 I free handed the palm tree with some black polish.


Today, while I soaked up some sun rays I decide to paint my nails. Since, summer is coming to an end for nail world, I decided to use something bright. I originally thought my watermelon nails would be my last summer mani but they didn't last as long as I except and I kinda got tired of them. I knew I wanted to use yellow in my manicure but I wasn't really sure how. I played around with some colors and designs for a bit, before I decided I would give the sponge effect a whirl. I had never done a full sponge mani before. But today I decide i wanted to try something new. I looked at several shades of reds, oranges and yellows. I never realized how many of these colors I had. I finally decided on four colors, they were. "Excuse Me" from Pure Ice, "Sunny Side Up" from Wet N' Wild, "Yellow" and "Orange" both from LA Colors.


For the sponge effect I started with "Orange" at my cuticle then I add "Sunny Side Up," "Yellow" and at the tip "Excuse Me". I had some trouble getting the polish on the sides of my nails so I used a paint brush the get near the sides. This mani took me about two hours to complete, however, I am somewhat of a perfections so it usually takes me a while anyways.  I was concerned about the texture of the effect. But after, I applied two coats of clear coat the texture was pretty much gone. I really wish I had the Kodad Stamper right now though. Because the palm tree pattern would look really amazing with the polish. Tomorrow, I might try to free hand a palm tree if I have time. But even without the palm tree I love the way the sponge effect turned out and will defiantly do it again. :)
What do you think?
Would you give the technique a whirl?

XOXO's
Love and Nail Polish,
Sierra
Tuesday, July 26, 2011

Pure Ice Crackle


I am probably up way too late typing this, but I just couldn't wait! In my last post I wrote how I finally found the new Pure Ice Crackle polish at Walgreen's. Well I used it tonight!!! This was the first time I have ever used a crackle polish, and so far I really like the way it turned out.
Before I painted my nails I looked up some sites about how to do the crackle polish. I was assuming there was a trick to get the crackle to turn out as cool as it looks in the pictures. When I brushed the polish on I was shocked how it just instantly crackled. I was surprise how easy it was to apply and I think my nails turned out great.


For this Manicure, I used "Blue collar" from Orly, "Dream On" from Sinful Colors, "Sunny Side Up" from Wet n' Wild, "Wild Thing"  and "Cream Flirt Alert" both from Pure Ice. I decide to paint each nail a different color for a more playful effect. It also gave me a chance to see the how the crackle polish would do on different brands of polish. I thought the polish did the best on the nails with the Pure Ice polish as a base coat. It turned out the worsted on the Wet N' Wild polish. I am not sure if it was because I ended up putting two coats on crackle polish on the orange or if the was just the base polish. I also learned the thinner coats look better; at least that is what I think. I love how the polish gives my nails a punk-ish look but still looks clean and pretty. I am hoping to get more crackle colors and try more brands in the future
                      
XOXO's                                                                                                                                                 Love and Nail Polish,                                                                                                                            Sierra.

Sunday, July 24, 2011

Half-Moon Nails


I finally decided to try out the half-moon nail technique and I loved them!!! I started out by picking three different base colors. My choices were "Blue Collar" from Orly, "Wild Thing" and "Cream Flirt Alert" both from Pure Ice. I know it seems like I have been using these colors over and over again, which I have. But I do have more colors. I have just fancied these over my other colors lately. After, I painted the base coats in a rotating pattern, I applied the black which is "Liquid Leather" from Finger Paints. To make the half-moon effect I used note book page reinforcers. I placed them near the bottom of my nail on to the base coat. Then I painted the black on the upper part of my nail. I had some trouble get the stickers off my nails. I think it had to do with my fingers getting wet and it took a while for the polish to dry. Also, I was somewhat impatient with the drying process. Whoops!
After, I peeled the stickers off I dotted on four silver dots using my doting tool. The sliver is "Silver Mercedes" from Pure Ice.  After the dots dry I used one or two coats of clear coat just to protect my nails. For my thumb nail, I hand painted a design using a paint brush, and then used my dotting tool to apply more silver dots. Over all this manicure was fairly easy and I loved the way it turned out.

Friday, July 22, 2011

Adding to My Always Expanding Nail Polish Box.

Happy Friday!!! I hope you all have an amazing weekend. Well, my Friday was made so much better when I found these polishes. I think some people have begun thinking that I am obsessed with Polish. But, a girl can never, ever, ever have enough nail polish, lol.
Left to Right- Wet N' Wild "Sunny Side Up", Sinful Colors "Dream On",
Pure Ice Crackle "Strobe Light"  and Hard Candy "Matte-ly In Love"

While I was out, I picked up the Hard Candy "Matte-ly In Love" polish at Wal-Mart for only 4$. I was super happy. I have been seeing so many different people do matte nails and now I can't wait to try them out myself.


I FINALLY FOUND MY PURE ICE CRACKLE!! I was super happy! I saw the polish display, first thing when I walked through the doors at Walgreens. I automatically walked over and began scanning over all the colors. I found the black which is called "Strobe Light" for 3.99$. I figure the black would be a good color to start with, since I have never done crackle before. I have already started thinking of colors to put behind the black. I can't wait to use this polish.

 
Also, at Walgreens I found these two colors. I thought they looked very summer-ish and I just liked the colors. The orange is "Sunny Side Up" from Wet N' Wild. I had been looking for a creamy light orange color for about a month. When I found this one for only 0.99$ I knew I had to snatch it up.
The Purple is "Dream On" from Sinful Colors. I have never used this brand before so I am curious about how the formula will go on my nails. I guess I will be finding out soon.

I think I am soon going to need a bigger nail polish box.


Well that wraps up my nails polish findings :) Hope you all have an amazing weekend.
XOXO's Love and Nail Polish
~Sierra.

Summer Time French Tips


After, wearing my snake skin manicure, I decided I wanted something bright. I went back n forth between tips or solids for a little while and then I finally decided on these summer looking French tips. For the base coat I used French Peach from I <3 my nails, I always use a cream/clear coat before I add the polish for the tips. For the tips I used "Blue Collar" from Orly, “Wild Thing" and "Crème Flirt Alert" both from Pure Ice. After, my nails dried I thought they looked to plain so I decided I would do a dot design. I use the three colors listed above and add an orange color. This color is "Bright Orange” from LA nails. LA colors are not very creative with their names, but I love the fine tip brushes. To do the dots I dropped some finger nail polish onto an index card and then dipped my dotting tool in the dot of polish that was on the card. It was fairly easy, except the polish I had dropped on to the index card dried extremely fast. But I think that had to do with me painting my nails outside in the heat


I tried to get a picture of the sparkles. This was the best pic I was able to take.
Once my nails had completely dried I used a sparkly top coat from Finger Paints called "Holiday Sparkles". I don't quite understand the name because in curtain sunlight it was blue and purple.  However, I thought it added a good slightly sparkly finish.


XOXO's Love and Nail Polish,
~Sierra

Saturday, July 16, 2011

Snake Skin Manicure!

When I found this Mani on The Looks for Less I was ecstatic. I literally think I remember squealing with excitement. I read her entire post, watched a video and even searched Google for more information of different ways to this technique. I found out that is mani had been showed on the today show recently and to have it done in salons it has whooping 150$ to 300$ price tag. I knew I could do it for way less and was excited to give it a try.  After, a few days of researching I set out on my hunt for snake snuff. Snuff is the skin that the snake sheds naturally it is also more humane then using real snake skin. I guess it is one snake’s trash is another person’s treasure lol. At the time we were camping in a state park, so I decided to ask one of the rangers at the nature center if they had any snake snuff I could use. I got a strange look, but after explaining why I wanted it, the ranger seemed on board. Jen gave me three different kinds of snake skin and about five pieces. She even came over the next day so I could to a trial run on her nails. I was excited about doing her nails and it taught me a lot before I did the technique to my nails. I think both of our manicures turned out great!


For the Snake Skin Mani you will need:
•Real Snakeskin (Snake Snuff)
•A Base Coat
•A Base Color
•Thick Clear Top Coat
•Small Scissors
•Tweezers
I started by using a deep brown base coat, For my base coat I used "Bronze Baby" from Petties. Jen decided that she wanted to use four different colors for her manicure. So, I used "Bronze Baby" from Petties, "Magic" from Pure Ice, and "Totally Toffee" and "Copper-glaze Platinum" both Revlon. I cut the snake skin to fit each nail and then applied a think top coat; before it could dry I used the Tweezers to carefully place the snake skin onto the nails. Once the bottom coat had dried good, I did the trimming to the snake skin. Trimming it just insures that all of the snake skin it against your nails. Next, I applied two thick layers of top coat.  The texture of the snake skin is slightly odd but I was able to get used to it after a day or two. After wearing the mani for a few days, I found that the snake skin with the smaller scales worked better than the skin with the bigger scales and they also have less texture.
As you can tell, I'm still working on the whole water marking thing. Any suggestion would be super helpful!

Over all the mani was amazing. I will definitely be doing it again.
What do you think of the manicure?
Would you try it yourself?

XOXO's Love and Nail Polish,
~Sierra