Showing posts with label Designs. Show all posts

Sunday, October 7, 2012

Layering Technique


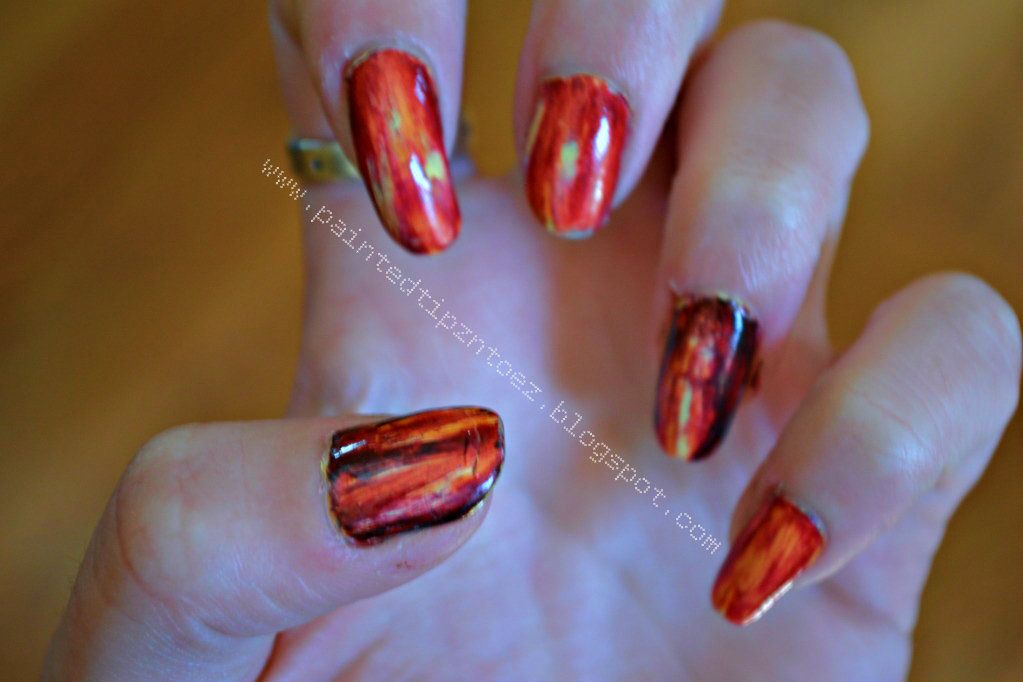
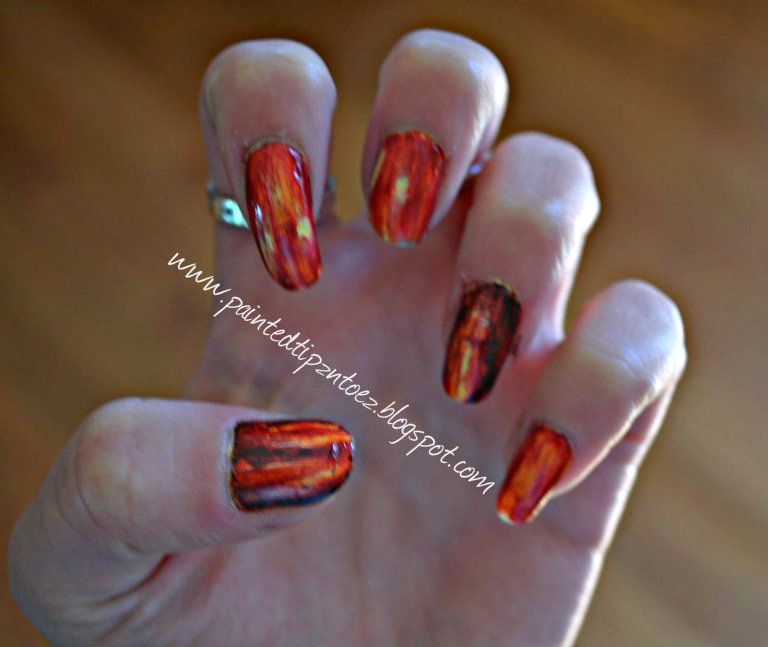
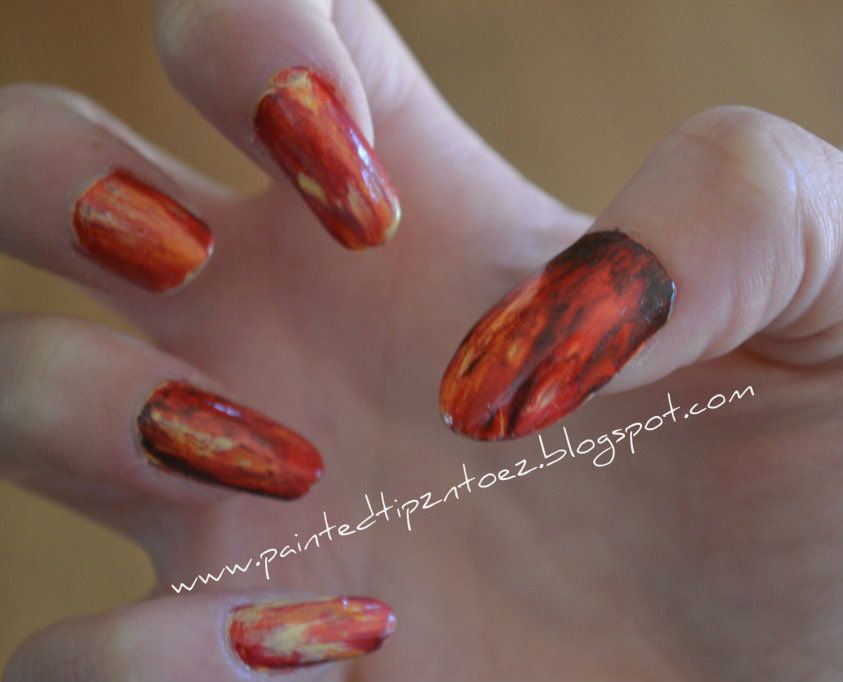
I saw an awesome nail design technique on pinterest and I thought I would give it a whirl. Here is the technique.

 
The way you do this technique is to layer the nail polish in thick coats. You can layer them dark to light or light to dark that choice is up to you. Once the polish is completely dry, you take a paint brush socked in acetone and slowly remove some of the layers of nail polish reveling the different layers. Just make sure you don't go all the way to your natural nail because then you will have to fix it. Over all this is a super easy design. The technique I saw on pinterest used black and vibrant color polishes, but I'm still addicted to all fall colors. So of course I went with oranges, reds, yellows and browns. Over all I thought this technique was really neat. I think it would look better with bright colors and black but I still like the fall colors.


Colors I Used: (in order I painted them)
Index, Middle and Pinkie: "Lemon Fizz" from China Glaze, "Sunny Side Up" from Wet N' Wild, "350 Big Night Out" from Rimmel, and "228 Chelsea" from NYC
Thumb and Ring: "Lemon Fizz" from China Glaze, "Sunny Side Up" from Wet N' Wild, "350 Big Night Out" from Rimmel, "228 Chelsea" from NYC and "Hot for Chocolate"  from Revlon

What do you think of this technique??

XOXO's
Love and Nail Polish,
Sierra

Sunday, January 1, 2012

New Year’s Blingy Manicure

Every New Years I try to pull off the blingiest, sparkly, fabulous manicure of the year. This year I achieved exactly the look I was wanting.


Colors I used:
Base Coat- "Positive Energy"- Nicole by OPI
Thumb and Ring Finger- "Set the Stage"-Sally Hansen Xtream Wear, Gold Glitter over Base Coat
Index- "Set the Stage"- Sally Hansen Xtream Wear, Gold Glitter over Base Coat. "Pearl Black"- Kiss Nail Art (For writing)
Middle and Pinkie- Black: "Twilight"- Jordana, "Night"-Petites, "Pearl Black"- Kiss Nail Air. Gold: "Big Spender" Pro, "Flower Girl" Sinful Colors Nail Art, "Set the Stage"-Sally Hansen Xtream Wear, and Gold Glitter. Sliver: "Insolence"- Rimmel, "Positive Energy"-Nicole by OPI and "Rock Star"-Kiss Nail Art.
**Extra the Gold Glitter I used was not nail glitter. It was craft glitter, but very fine.

How I did it-

To design my Thumb and Ring finger I started with a base coat and I paint 2 coats of "Set the Stage." Then I sprinkled on some gold glitter. I had some issues finding the jewels I wanted. So I actually found iron on jewels at Walmart for 1.99$ They were the prefect size and cheaper than the jewels I was looking for. I bought 2 packs and got over 300 jewels. To apply, I placed a dot of super glue on my nail and the jewel on top. I Carefully pressed down on the jewel to make sure it stuck.
Next I painted my Index finger. I did it the same way as my thumb except I painted 2012 using a nail art brush.
My middle and pinkie fingers were a little more of a challenge. For them I did a gradient effect with glitter. I started by painting my nails "Positive Energy." Next, I sponged the black layer on, using "Twilight," "Night," and "Pearl Black." I had some issues getting the black to apply dark enough. But that could have just been the colors I was using. Then, I sponged on the gold, using "Big Spender," and "Flower Girl. After, the gold dried I used my dotting tool to picked out some of the glitter hexes from "Set the Stage". I placed them on the gold part of my nail and also sprinkled over some gold glitter. For the silver I used "Insolence," and "Rock Star" over my silver base coat. "Rock Star" was a glitter packed polish so I did not need to add any glitter.
I placed 2-3 coats of top coat over all my nails. However, I was paranoid that the jewels would fall off so I added 2-3 more coats of top coats to those nails.  Over all I loved this mani, I got lots of complements on them and they definitely said HAPPY NEW YEARS.
Tuesday, October 25, 2011

YING-YANG TOES!!

I usually don't post my pedicure designs, but I absolutely LOVE this one! I recently saw a manicure design using the ying-yang symbol. I really liked it and have wanted to do this design on my nails. Sadly, I haven't had a chance to do it yet. However, I did get it on my toes!!!
\

I have to say, this is probably in my top 10 favorite pedicure designs!! It was super easy to paint and very quick. I used "Liquid Leather" from China Glaze for the black and "White" from I Love My Nails for the white. But any black of white will work just as well. Now I can't wait to do this design as a manicure. Hopefully I will get around to that soon.
XOXO's
Love and Nail Polish,
Sierra

Friday, October 21, 2011

Fall Nails


One of the biggest trademarks of fall, are pumpkins and that pretty much sums up my manicure for this week. I surprised myself with being able to achieve this design. Because I honestly didn't think I would be able to get the pumpkins painted right. But I think they turned out pretty good for my first time.

  For this mani I used "Magic" from Pure Ice on my thumb and ring fingers. This is a brown-ish/red polish and it looks amazing for fall inspired designs. For the rest of my fingers I used "Big Spender" from Pro. On the nails with "Big Spender" I used my dotting tool to paint six vertical lines of dots in the same colors that were on my pumpkins. To paint the pumpkins I used three different paint brushes and my dotting tool. I ran in to some problems with the shades of polish. So I ended up mixing "Orange" from LA Colors, "Sunny Side Up" from Wet and Wild and "Lemon Fizz" from China Glaze to make the three colors for the pumpkins and the stem of the pumpkins.  First I free handed the outline of the pumpkins in one of the shades of polish I made. Then using my dotting tool and a medium paint brush I filled in the outline. After, letting the base coat of the pumpkin dry, I added the stem and the highlights with my small tip paint brush. Over all this mani took about two hours total and it was a great fall design.


XOXO's
Love and Nail Polish,
Sierra

Monday, October 17, 2011

Candy Corn Nails

I was going to a party this past weekend and I wanted a cute, eye catching manicure. I looked at doing spider webs, leaves and a few other designs and I finally decided on Candy Corns!!

Look good enough to eat? ok well maybe not that good haha
This mani was super easy! For my two accent fingers I used "Big Spender" from Pro. This is my first time using this polish and so far I really like it. The polish takes about two coats to apply and it is a great gold shade. Also, the polish does not chip easy and the brush is a great size. I plan on using this color for a lot for future manicures. For my other nails I used "Orange" and "Yellow" from LA Colors and "White" from I Love My Nails. I first thought it would be easiest to tape each nail to get a straight line. But after using tape for one hand I decided it would be easier to just free hand. I also did the candy corns free hand. For them I first drew the outline in white. Then, I painted the orange, yellow and white letting each dry in between. For my ring finger I used the same colors and my dotting tool to make the dots in straight lines. This manicure took about an hour or so. But most of the time was spent waiting for polish to dry before I added the next color. I really liked the way it turned out and I got a ton of complements.
XOXO's
Love and Nail Polish,
Sierra.