Showing posts with label Sponge. Show all posts

Saturday, August 4, 2012

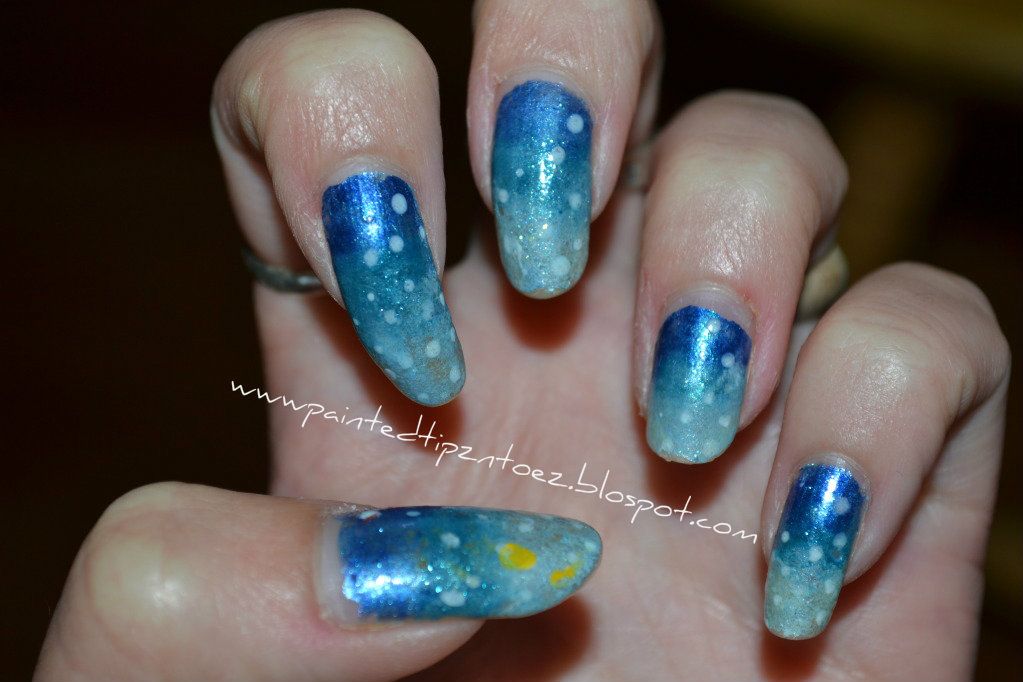
Blue Sponge Effect

 
This mani was a slight fail! When I started painting I had intended on making the a deep sea inspired manicure. However, when I went to add the sea horses and sea weed.....Well lets just say it didn't work out and I didn't have enough time to come up with a plan B. So this is the mani I went with! I actually really liked it, despite the slight fail.


Colors I Used:
Base: "Splash" from Pure Ice,
Bottom Layer: "Skin Tight Denim" from NYC, and "Sturdy Sapphire" from Sally Hansen,
Middle Layer: "To-Teally Chic" from Finger Paints
Top Layer: "Waterfall" from Revlon "French White Tip" from NYC, "Once Again" and "Mint Dream" from Pure Ice
Bubbles: "Waterfall" from Revlon "French White Tip" from NYC, and "Mint Dream" from Pure Ice
Top Coat: "Oh Baby" from Pure Ice


XOXO's
Love and Nail Polish,
Sierra 

Thursday, September 8, 2011

A Different Kind of French Tips

After, failing at a design a friend wanted me to try I decide to go with a different kind of french tip for my mani.


This week I decide to just go with a funky French tip design.


For the base coat on my nails on used "Dream On" from Sinful Colors and for the tips I used "Risk Taker" from Pure Ice. I thought the plain tips didn't look cool enough so I decide to add abstract stripes and dots to the tips. I did the light silver stripes in my fine tip "Silver" from L.A Colors. The Black and White Dots are done using my dotting tool in "Liquid Leather" from China Glaze and "White" from L.A Colors. After, doing that design I decide it still wasn't enough so I did a sponge effect on the tips. I used "Kiss Me Here" from Pure Ice and then I sponged on a small amount of "Liquid Leather." I sponged the gray about half way down the tip and I placed the black about a 1/4 of the way down the tip. This design wasn't amazing. But I did think it was cool and my boyfriend loved them. For some reason the past few mani's I have done, have not amazed me. I'm not sure why, I think is because I haven't had time to do a time consuming design lately. Oh! the joys of school... However, I did learn something new about the sinful colors polish. I didn't clear coat my nails because I did not want to design to last long. I thought the purple color would look a little matte. The first time I painted them, the color was matte until I used a clear coat. This time after a few hours of wearing the color it became shiny. I'm not sure if the color needs to set or what but it did shine after some time. I also found out the Sinful Colors flakes EXTREMELY easy. I wore this mani for about three days and it looked like I had worn it for a week or longer. This is definitely a color that needs a top coat.

Over all this mani
XOXO, Love and Nail Polish,
Sierra