

Colors I Used:
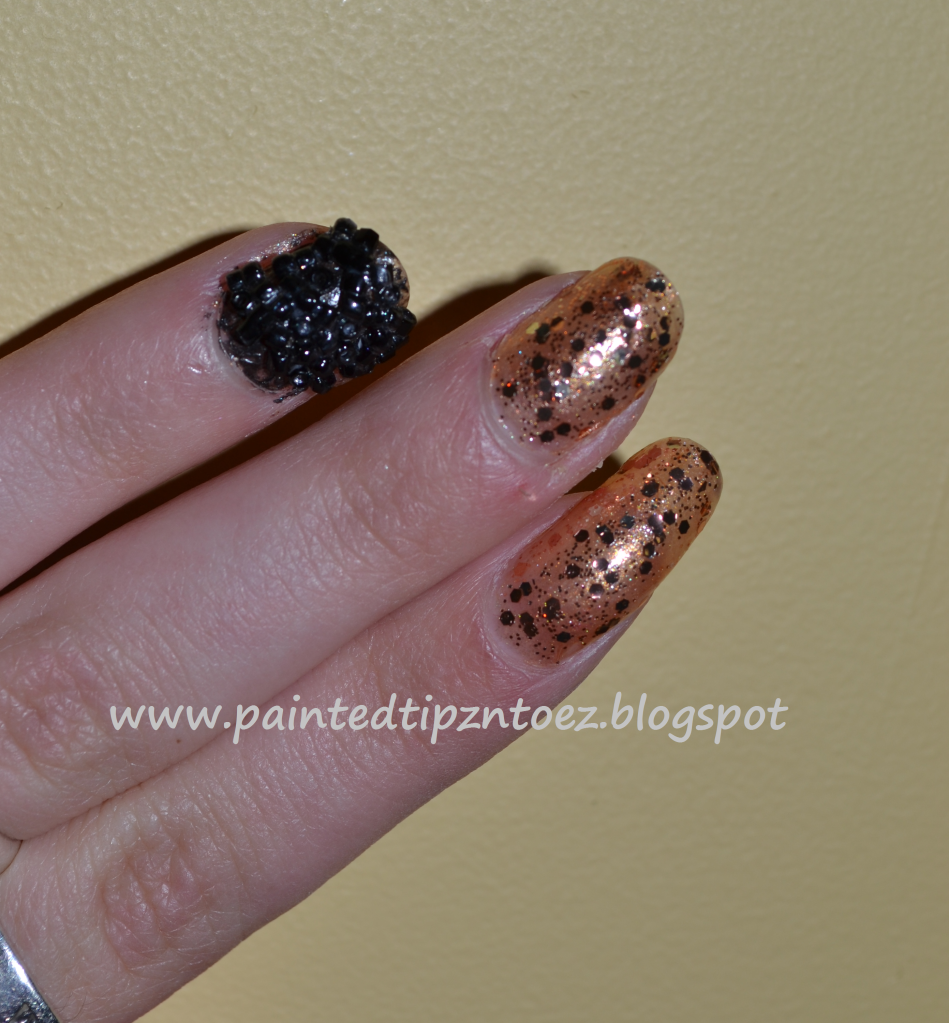
Bead Nail-"Electric" from Pure Ice
Gold Nail- "Gold Dust" from Pure Ice, "Traffic-Stopper Copper", and "The Gold and The Beautiful" from Sally Hansen
How I Did It:
For my gold nails I applied two coats of "Gold Dust" Next, I added two coats of "Traffic-Stopper Copper" a layer of the "Gold and the Beautiful" and two more layers of "Traffic-Stopper Copper" Both of these polishes had a clear base and I wanted my nails to be glitter packed so it took more polish then I expected.
For my beaded nails, I started by painting my nails black. After, the polish had dried completely. I added a thin coat of nail super glue on top of my nail. I placed my nail over a small container and began dumping the beads over my nail. Once, I had the desirable amount of beads on my nails, I pressed them into the glue. I added more as needed. Sometime the sides of my nails had no beads adhere to it, so I placed more beads. I repeated the process till my nails were completely covered in beads. The only down fall to this effect, is it chipped super easy. One of my nails had chipping after just a few hours of wear. Over all the looked turned out ok. Not as good and the Ciate brand, because the beads were not small enough. But it looked rather cool.
XOXO's
Love and Nail Polish,
Sierra
No comments:
Post a Comment