Tuesday, May 29, 2012

Oreo Cup Cakes

Time for another adventure on Pinterest, I was looking for a desserts recipe this week. I didn't really know what I wanted. So I went to my lovely Pinterest boards and began looking. I saw several recipes I wanted to make. However, this Oreo Cup Cake recipe sparked my interest, so I decided to give it a whirl!!


These turned out AMAZING!!! So yummy! My entire family loved them! I would definitely make them again! I was about 10 Oreos short and I also did not have the mini Oreos, so they were not as Oreo packed as they could be! I also made half of them without the Oreo on the bottom of the cupcakes. Still yummy! But, if you have the Oreos place them in each liner. Having the whole Oreo as one layer and the cake as another is a great combo. I ended up making 12 cupcakes and a 9x9 sized cake, with PLENTY of icing for both. The only problem I had was the icing was a little thick for my taste. So I added a little bit of milk to the icing which the recipe didn't call for. Over all this was an amazing recipe. I will the definitely be keeping it own my board.

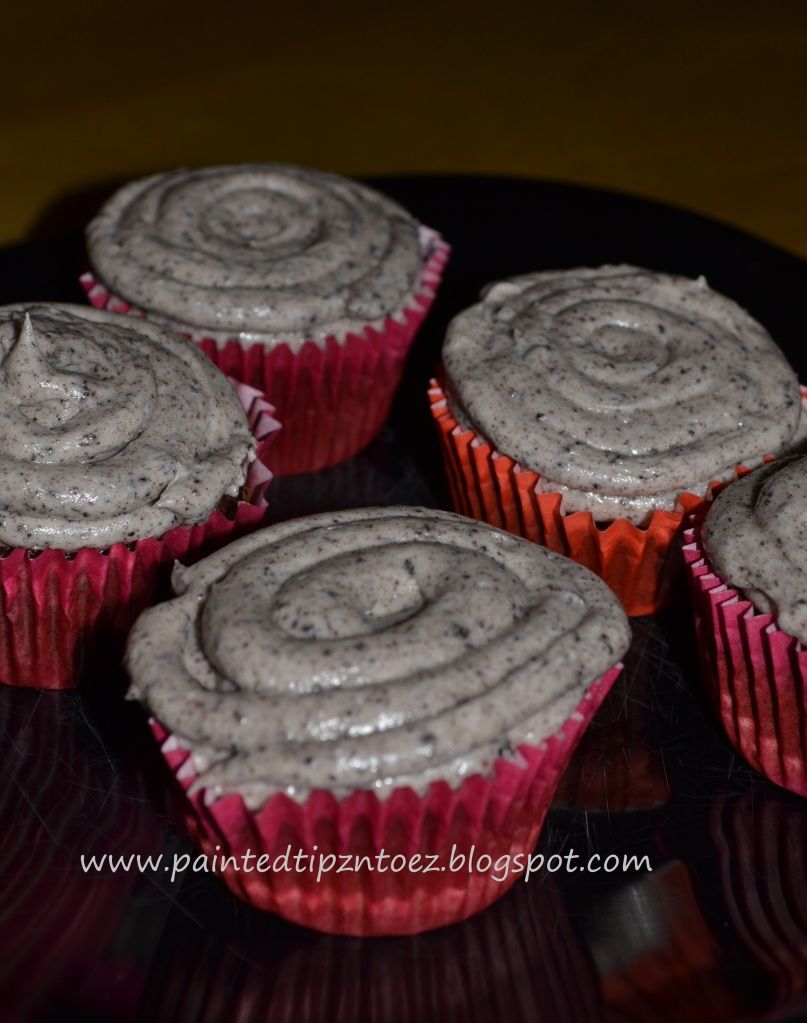
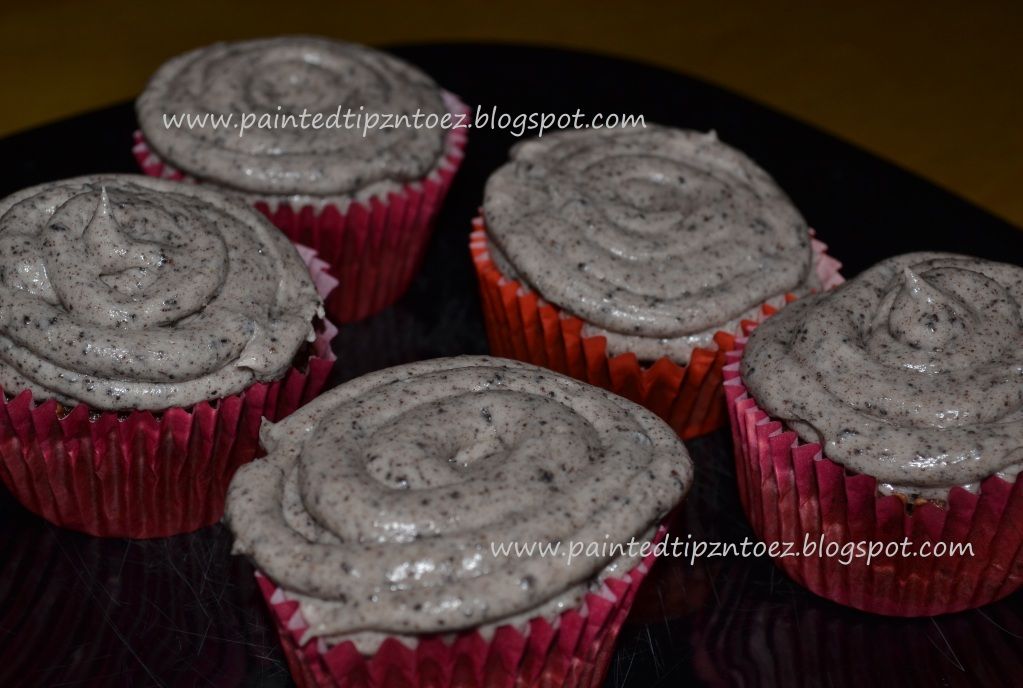
Oreo Cupcakes Recipe:

Estimated Cooking Time: About 25 to 30 minutes

Ingredients 1 package Oreo Cookies, regular size
1 package Mini Oreo Cookies, for decoration (optional)
1 package chocolate cake mix (mix according to directions on box)
8 ounces cream cheese, room temperature
1/2 cup butter (1 stick), room temperature
3 3/4 cups powdered sugar
1 teaspoon vanilla extract
cupcake liners

Preheat oven to 350 degrees. Mix packaged cake mix according to directions (do not bake). Line cupcake tins with liner, place a regular size Oreo cookie in the bottom of each liner. Take 1/2 of remaining cookies and chop coarsely and add to cake mix. Fill the cupcake tins. Bake for 15 minutes (or according to box directions). While cupcakes are baking make the frosting.

Cream together butter and cream cheese. Add vanilla, then add powdered sugar slowly until blended well. Chop remaining regular-sized Oreos very fine (I put the cookies in the blender instead of trying to chop them up super fine and it worked out really well). Add to frosting. After cupcakes have cooled frost and decorate with Mini Oreos

Sunday, May 27, 2012

Ninja Nails


This week I wanted a cute and fun mani. After, racking my brain for something fun. I decided to do Ninja Nails! I have wanted to do this design for a while but never got around to it. But this week it was time to break out my ninja nails.
This mani was super easy!!! My favorite nail was my pink ninja.


My Pink Ninja! This was my favorite nail!
Colors Used:
Base Coat: "Silver Mercedes" from Pure Ice and "Black Heart" from Sally Hansen
The Ninja Faces: "Sunset Sail" from China Glaze
Ninja Stars: "Silver Mercedes" from Pure Ice and "Black Heart" from Sally Hansen
Ninjas on my Pinkie Finger: Pink Striper from Stripe Rite
"Rock Star" from Kiss Nail Art Paint,  "Wild Thing" from Pure Ice and "Sunset Sail" from China Glaze


Ninja Stars

My Green Ninja :)

Xoxo's
Love and Nail Polish,
Sierra

Thursday, May 24, 2012

Nails for My Boyfriend's Graduation

On Saturday, My boyfriend, Isaac had his graduation
For my nails I decided I wanted something super cute, with some cool nail art. That would also match my dress. I had already bought my dress so I knew what colors I wanted to use. I ended up doing a sorta of Indian/boho kind of look. Which I got tons of compliments on! I also will include a picture of my dress below.


I really love the way this design turned out. I hand painted all my nails but my ring fingers. For my ring finger I did the water marbling effect. The only trouble I had with is manicure, was finding an orange to match my dress. I thought of going out to buy one. But time never allowed so I ended up making my own. For this I used one dot of "Big Night Out" from Rimmel, three dots of "Sunny Side Up" and three dots of "Hot Tamale" from Love My Nails. This mani match my dress perfectly and I love the way they turned out.

Colors I Used:
Base Coat- "Blue Collar" from Orly
Thumb and Middle Finger: "Magic" and "Gold Dust" from Pure Ice "Warm and Fozzie" OPI and
Orange
Index and Pinky Finger: "Warm and Fozzie" OPI, "Magic" from Pure Ice and the Orange I made
Ring Finger: In water marble I used- "Gold Dust," "Best Friend" and "Magic" and "Splash" Pure Ice

Other Pictues From The Graduation!


Waterfall Braid, I had a friend do for me! 

Back of my waterfall braid


My make up! I decided to do a neutral look with an orange,


My Boy and I

 This was the only picture I ended up getting of my dress. Not the best picture of the dress. But it is super cute. I ended up wearing some copper wedges with it! Which went with the dress perfectly.

XOXO's
Love and Nail Polish,
Sierra 

Wednesday, May 16, 2012

Gold and Beaded Nails


A few days ago, on pinterest I saw the caviar polish from ciate. I love the effect it gives to your nails and I am definitely thinking about purchasing myself a bottle. However, I wanted to try out a cheaper way to see if I could get the same effect. So I went out to Michael's and found the smallest beads I could find. This took about 20min and my boyfriend and I both looking. But we found them!! When I got home I decided I wanted to do a gold and black design.

Colors I Used:
Bead Nail-"Electric" from Pure Ice
Gold Nail- "Gold Dust" from Pure Ice, "Traffic-Stopper Copper", and "The Gold and The Beautiful" from Sally Hansen


How I Did It:
For my gold nails I applied two coats of "Gold Dust" Next, I added two coats of "Traffic-Stopper Copper" a layer of the "Gold and the Beautiful" and two more layers of "Traffic-Stopper Copper" Both of these polishes had a clear base and I wanted my nails to be glitter packed so it took more polish then I expected.
For my beaded nails, I started by painting my nails black. After, the polish had dried completely. I added a thin coat of nail super glue on top of my nail. I placed my nail over a small container and began dumping the beads over my nail. Once, I had the desirable amount of beads on my nails, I pressed them into the glue. I added more as needed. Sometime the sides of my nails had no beads adhere to it, so I placed more beads. I repeated the process till my nails were completely covered in beads. The only down fall to this effect, is it chipped super easy. One of my nails had chipping after just a few hours of wear. Over all the looked turned out ok. Not as good and the Ciate brand, because the beads were not small enough. But it looked rather cool.


XOXO's
Love and Nail Polish,
Sierra 

Sunday, May 13, 2012

Peach Nails with Nail Art


Colors I Used:
Thumb and Pinkie- "Mighty Mango" Sally Hansen
Index and Ring- "Dreamy" Pure Ice
Middle- "Portobello" from Nails Inc.

This week I wanted a simple but cute mani. Since I am currently, slightly obsessed with "Portobello" from nails inc. I decide to use three colors "Portobello" being one of them. For my thumb and pinkie finger I used "Mighty Mango" from Sally Hansen. For my index and ring finger I used "Dreamy" from pure ice and "Portobello" for my middle finger. All of the polishes looked very similar so they worked nicely together. I decide to paint all my designs in "French White Tip" from NYC, which is just a white polish. This way all my nails would tie in together. For my thumb and index nails I painted a heart. Then for my ring, pinkie and index nails I painted dots and stripes. Over all this mani was simple an easy but very cute!!
XOXO's
Love and Nail Polish,
Sierra